IT

EMC Clariion: a superb rack installation 150 200 Roderick Derks

EMC Clariion: a superb rack installation

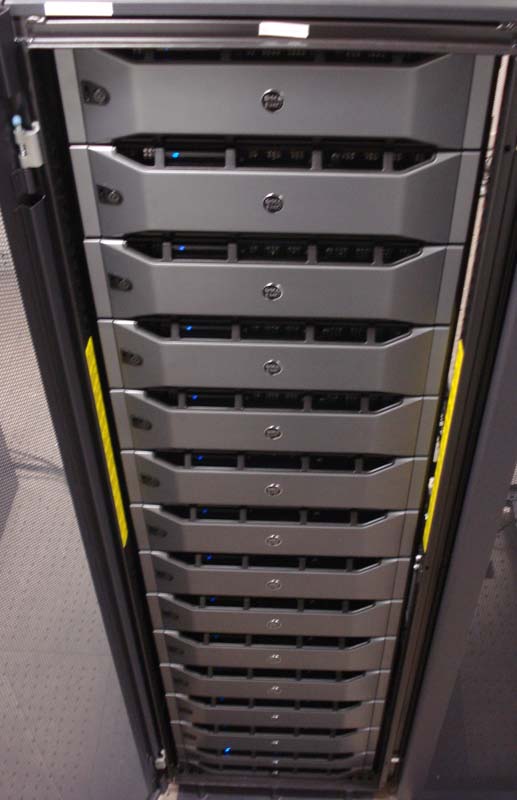
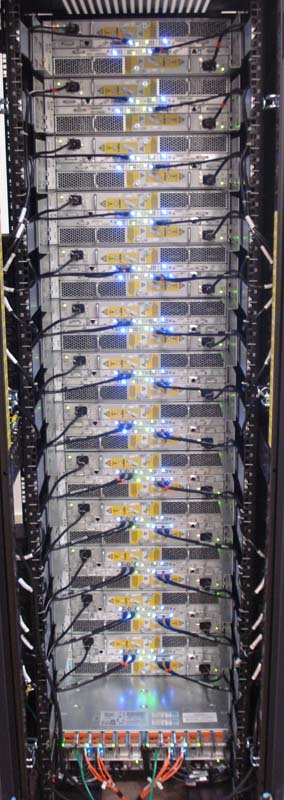
After months of planning and designing and waiting and talking and waiting and emailing and more waiting this week I finally installed and configured a new storage system: an EMC Clariion4-480. This will be a remote storage for disaster recovery usage.

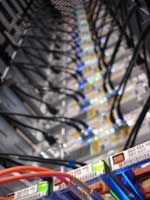
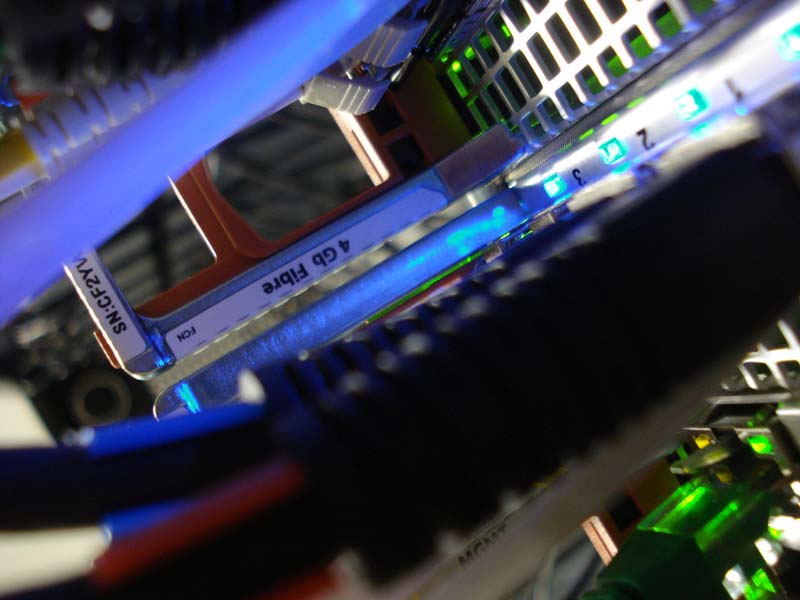
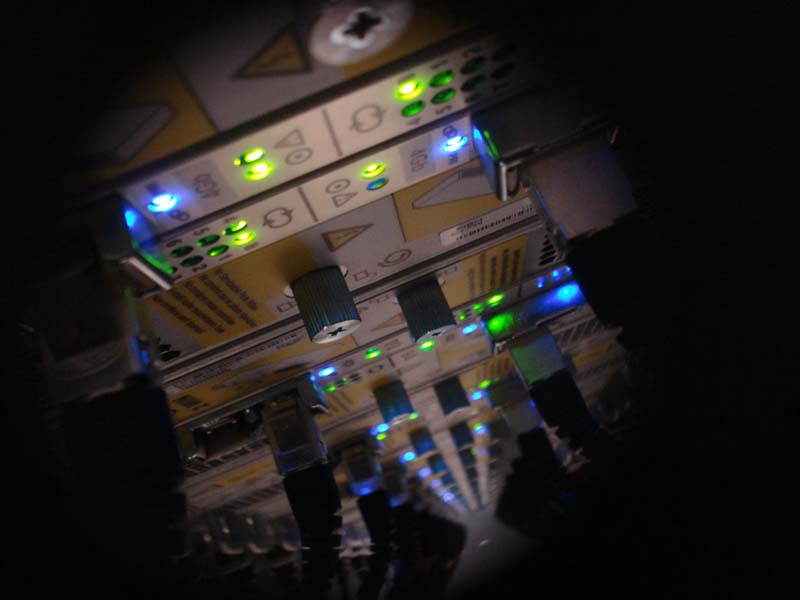
The guys who actualy build the storage in the rack did a great job, very synchronic, almost a piece of modern art. Had to take some photo's.

Simple Firewall Configuration Using iptables/netfilter 150 150 Roderick Derks

Simple Firewall Configuration Using iptables/netfilter


Article writen by David Mair (Novell), it's interesting enough to store it in my own knowledgebase.

Most major Linux distributions, SuSE ones included, feature some user interface for firewall configuration. There's nothing wrong with them but I couldn't get quite the configuration I wanted and chose to create configurations manually. The iptables man pages are really a documentation of syntactical detail of the iptables command line and don't provide guidance on composition of a firewall from a series of rules. There's a lot of scattered information about iptables that can be found using your favourite search engine but none of it quite taught me what I needed to know. In the end I figured out what I needed using a Vmware virtual machine running SuSE Linux Pro 10.0. The following is offered as documentation of simple firewall configuration using iptables. Verifying that the resultant firewall adequately secures the relevant hosts is left as an exercise for the reader.

Even though it's hard to get to grips with, iptables/NetFilter is fabulously cool. The set of functionality is broad and the configuration method very expressive. That's an advantage if the distribution included firewall features don't quite give you what you need.

The SuSE firewall configuration and resultant scripts use multiple custom groups of rules. My goal is to show a simple firewall example that has a waterfall style in default groups only. I found it easier to understand the resultant firewall configuration script and also found it easier to express my intentions.

iptables/NetFilter Elements

NetFilter is the set of kernel components that actually executes the firewall rules. iptables is the program that is used to define and insert the rules. From this point forward I may use iptables to refer to NetFilter.

iptables configuration requires specification of a "table", a "chain" and the rule details. A chain is a group of rules. The rules in a chain are applied in a context defined both by the chain itself and a "table". The table is a group of chains. The table defines a global context and chains define a local context within that table. The simplest example would be to consider the host running the firewall. It can receive packets (input) and send packets (output). Assume we want to filter traffic going in and out of the host. The global context (table) is "filter". The local contexts (chains) are "input" and "output". A Linux host can also operate as a router and forward packets. So, the filter table also has a "forward" chain.

You are probably quite familiar with Network Address Translation (NAT). This is a method of multiplexing IP address space. iptables has a group of chains in a nat table. The prerouting and postrouting chains contain rules that act on packets as they arrive and leave the host respectively plus there is an output chain to act on packets from the host itself.

There are two other tables, mangle and raw, that I won't discuss in detail here.

What Are We Trying To Build

For my own use, I wanted to use Linux and iptables to replace a Windows NAT router/firewall at home. I have a few hosts on the private network so I need a NAT router to give them Internet access. A couple of my private hosts run servers I want to expose to the Internet and there are some services running on the firewall itself that I want to expose to the Internet. It's arranged something like this:


Network Host Description
192.168.1.0/24   Private network I want to be able to access Internet (via NAT routing)
  192.168.1.1 The private interface on the router
10.0.0.0/24   The public network the router is connected to
  10.0.0.1 The public interface on the router (the real router has a routable, static IP address). This should be locked down except for the services I want to be exposed
  192.168.1.254 A smtp/pop mail server that I want to be able to access from the Internet
  192.168.1.253 A http server that I want to be able to access from the Internet
  10.0.0.1:2202 A SSH server on the router but re-configured to use a non-standard port


Getting Started

The firewall is going to be configured using a [bash] shell script. The first thing I want to do is define some of the things I will use repeatedly:

# Private interface IF_PRV=eth0 IP_PRV=192.168.1.1 NET_PRV=192.168.1.0/24 # Public interface 1 IF_PUB=eth1 IP_PUB=10.0.0.1 NET_PUB=10.0.0.0/24 # Others ANYWHERE=0.0.0.0/0

This will let me use names for the various network elements and be able to change things easily in the future.

Each chain is used waterfall style. A packet is tested against each rule in turn and processed according to any matching rule. Each chain has a rule of last resort called the "policy". We start then with fairly restrictive policies:

iptables -P INPUT DROP

iptables -P OUTPUT DROP

iptables -P FORWARD DROP

This sets the policy for the three chains in the filter table to drop all packets. Note that the table isn't specified. iptables defaults to the filter table when none is specified.

Next we want to remove any existing rules from the tables:

iptables -F -t nat

iptables -F -t mangle

iptables -F -t filter

iptables -X

The first three statements flush all the rules from the nat, mangle and filter tables respectively. The last statement removes all user-defined chains.

Routing

The firewall I'm building here is also going to be a translating router. The IP stack on Linux can act as a router and it can be enabled quite simply:

echo 1 > /proc/sys/net/ipv4/ip_forward

Forwarding Rules

Since we are going to use the host as a router we'll start with the forwarding rules. We trust the private network so we want to allow all routed traffic from it:

iptables -A FORWARD -i $IF_PRV -o $IF_PUB -j ACCEPT

This accepts for forwarding, traffic inbound on the private interface and outbound on the public interface. This isn't enough though. The filtering is performed on a per-packet basis. We need to allow the traffic back from the public interface to the private. We can't allow everything though. NetFilter is aware of sessions so we can specify that traffic for pre-existing sessions is permitted:

iptables -A FORWARD -i $IF_PUB -o $IF_PRV -m state –state ESTABLISHED,RELATED -j ACCEPT

This adds a rule to the filter table's forwarding chain. The rule applies to traffic inbound on the public interface and outbound on the private interface. The rule loads the NetFilter "state" module and restricts the rule to operating on packets in the established session state and in the related session state. Matching packets are accepted for routing. The "related" session state is for cases where there is a secondary channel that is associated with the permitted outbound session, e.g. the data connection on a ftp session.

The Firewall Can Be Trusted

Well, if we didn't trust the firewall we shouldn't be using it as a firewall. The firewall needs to be able to access other networks.

First we'll deal with the the loopback (lo) interface. We can just allow everything to and from it:

iptables -A INPUT -i lo -j ACCEPT iptables -A OUTPUT -o lo -j ACCEPT

The rules should explain themselves but we can see that the first accepts traffic in the input chain of the filter table where the traffic is arriving at the lo interface. The second accepts traffic in the output chain of the filter table where the traffic is being output on the lo interface.

Equally, we want to allow the firewall to communicate with hosts on the private network:

iptables -A INPUT -i $IF_PRV -s $NET_PRV -j ACCEPT iptables -A OUTPUT -o $IF_PRV -d $NET_PRV -j ACCEPT

The first causes the firewall to accept incoming traffic on the private interface that has a source on the private network. The second causes the firewall to permit outgoing traffic on the private interface that has a destination on the private network.

We can't use the same rules on the public interface because they would allow any traffic to connect to the firewall. On the other hand, we want the firewall to have unrestricted access to public networks:

iptables -A OUTPUT -o $IF_PUB -j ACCEPT

iptables -A INPUT -i $IF_PUB -m state –state ESTABLISHED,RELATED -j ACCEPT

This allows the firewall to send traffic via the public interface to anywhere but, it restricts incoming traffic to only that for existing connections or related to existing connections. So, this allows the firewall to make a connection to some public host and for the traffic in that connection to be received but connections cannot be made to the firewall from the public network.

Note the difference between the private and public interface rules. We assume that anyone on the private network can be trusted and no-one on the public network can be trusted.

Routing For The Private Network

You'll notice that the private network is a non-public routed IP network. This requires address translation at a router with a public IP address or nothing on the public network will be able to return packets to the private network. Address translation is easily enabled with iptables. The addresses that are being translated are the "source" of sessions so the mode is called Source NAT (SNAT):

iptables -t nat -A POSTROUTING -s $NET_PRV -o $IF_PUB -j SNAT –to $IP_PUB

Note that we specified the table in this rule, -t nat. The rule doesn't apply to the default, filter table. The rule is applied in the NAT table's post-routing chain. In other words, after the routing decision has been made. The rule applies to packets with a source address on the private IP network that are being output on the public interface. The action of the rule is to perform SNAT and change the packet's source IP address to that of the public interface.

You might wonder why there is no rule to perform the reverse translation. In order for that rule to work, NetFilter would have to know which packets to apply it to. The only sensible place to apply it is the session itself. Since NetFilter has to maintain a table of these anyway, there is no need for the reverse rule and the translation is automatically reversed on received packets in the session.

Philosophical Matters

So far we've dealt with all the things that we implicitly trust and implicitly distrust. Before deciding what to allow controlled access to I need to express my opinion on reasonable responses to provide to unaccepted traffic. So far, our policy is to drop packets we don't accept into a black hole. It's probably the most common behaviour for firewalls. It reveals no information to the sender of the traffic. But, it is often described as being a useful throttle on attackers who are forced to wait timeouts for responses. That was my philosophy but it is no longer. I read a Usenet post some time ago, around the time I was building my first iptables firewall. The post responded to these very points (reveal nothing, delay attacker) by offering the view that attackers are operating mass parallel scans so the delay is moot. It also offered the opinion that a properly protected host won't reveal anything useful to an attacker anyway so it made more sense to be a compliant IP citizen. I subscribe to both of these positions and my firewall responds as an unimpeded IP stack to most common scanning methods.

ICMP

I don't permit all ICMP traffic but I do permit ping, for example. Using the ICMP echo request is the simplest form of host scanning. If the host exists and has an unfettered IP stack then it will respond to the sender with an ICMP echo reply. Therefore, ping can be used to discover if an IP address is assigned to a host that is up. It may reveal the presence of my host but that will ultimately be revealed anyway by the web and mail servers I'm going to expose so why lose the utility of ping. The ability to use ping to discover a host isn't the only problem exposed by ping. Ping can be used as a denial of service (DoS) target. A host can be pinged to death by an attack where multiple remote hosts simultaneously ping the same host (your firewall). NetFilter has a module called limit that can be used to set restrictions on the amount of permitted traffic of some kind. So, my ICMP rules are:

iptables -A INPUT -p icmp –icmp-type 0 -j ACCEPT

iptables -A INPUT -p icmp –icmp-type 3 -j ACCEPT

iptables -A INPUT -p icmp –icmp-type 11 -j ACCEPT

iptables -A INPUT -p icmp –icmp-type 8 -m limit –limit 1/second -j ACCEPT

The type code for ICMP echo requests is 8. As you can see, the rule for those packets loads the limit module and sets a limit of 1 packet per second. The other type codes are echo response (0), destination unreachable (3) and time exceeded (11). These aren't rate limited because they don't cause the host to respond (as echo request does). The echo and destination unreachable types may seem obvious but it may not seem obvious why the time exceeded type is permitted. The time exceeded ICMP message is used to return time-to-live (TTL) exceeded errors. An IP packet has a field containing a number called the time-to-live. Every time a packet crosses a router the TTL is decremented. When the TTL reaches zero, the packet will not be forwarded any further and an ICMP time exceeded message is returned to the sender.

You might notice that these rules apply to all interfaces, not just the public one. I didn't have a specific reason to do that but don't feel it will have any measurable impact on the firewall or private hosts.

Services On The Firewall Host

So far, the firewall can make its own connections and will forward connections for the private network. It will allow returning traffic for established sessions both to the firewall itself and to hosts on the private network. It will also allow any traffic from the private network to the firewall. Now I want to expose a service on the firewall to the public network. It will be convenient for me to be able to have a ssh session to the firewall from the public side. Just to be a little tricky, I won't use the standard ssh port (22) and use 2202 instead:

iptables -A INPUT -i $IF_PUB -p tcp -d $IP_PUB –dport 2202 -j ACCEPT

This permits traffic arriving at the public interface with the firewall's public IP address as a destination and being tcp protocol with a destination port of 2202. Note that the ssh server had to be separately configured to listen on port 2202.

Just to be a little more careful we could rate limit connection attempts:

iptables -A INPUT -i $IF_PUB -p tcp -d $IP_PUB –dport 2202 -m limit –limit 1/minute –limit-burst 1 -j ACCEPT

This will limit ssh connections to one per-minute average with a (burst) limit of one at a time. The more obvious use of limit-burst is where you want to enforce an average rate but don't mind permitting a short burst from time-to-time. This would, for example, make it easier to deal with connection failures that happen at or near the start of a session. In this case I wanted to limit ssh connections to an average of 1 per minute and not permit more than one in a burst.

Services On The Private Network

I have a mail server and a web server but both are on the private network. I want them to be exposed to the public network but I only want the specific services to be exposed. I only have one public IP address (the private network has non-public routed addresses) and I don't want to run those services on the firewall. The traditional name for the solution to this problem is "port forwarding". The NAT router listens on the relevant port on its public interface and forwards any incoming connections or traffic to a destination on the private network, translating the IP destination address to the private target on inbound packets and the IP source address to the firewall's public address on outbound packets. iptables calls this functionality Destination NAT (DNAT). We expose the mail server as follows:

iptables -t nat -A PREROUTING -i $IF_PUB -d $IP_PUB -p tcp –dport smtp -j DNAT –to 192.168.1.254

iptables -A FORWARD -m state –state NEW,ESTABLISHED,RELATED -i $IF_PUB -p tcp –dport smtp -j ACCEPT

and the web server:

iptables -t nat -A PREROUTING -i $IF_PUB -d $IP_PUB -p tcp –dport http -j DNAT –to 192.168.1.253

iptables -A FORWARD -m state –state NEW,ESTABLISHED,RELATED -i $IF_PUB -p tcp –dport http -j ACCEPT

There are two rules for each service, one to perform the address translation and one to permit the routing of the packets. The DNAT rule is added to the PREROUTING chain of the NAT table. It applies to traffic arriving at the public interface with the firewall's public IP address as the destination. For tcp protocol traffic to a destination port of smtp (25) a DNAT translation is performed to re-target the traffic to a destination address of 192.168.1.254 on the private network. The second rule permits new connections and traffic for established sessions through the router when they arrive at the public interface and are tcp protocol packets with a destination port of smtp (25). The http case is the same but with the destination port changed to http (80).

Note that we were able to use the /etc/services name for the port (smtp, http, etc). Although the forwarding rule specified NEW,ESTABLISHED,RELATED only the NEW and ESTABLISHED states are meaningful for smtp and http.

You can repeat these examples for other protocols, e.g. pop3 to the mail server:

iptables -t nat -A PREROUTING -i $IF_PUB -d $IP_PUB -p tcp –dport pop3 -j DNAT –to 192.168.1.254

iptables -A FORWARD -m state –state NEW,ESTABLISHED,RELATED -i $IF_PUB -p tcp –dport pop3 -j ACCEPT

Logging The Rest

Since that's all I want to permit then it would be useful to know what is being blocked. We can add a logging rule to see that:

iptables -A INPUT -i $IF_PUB -j LOG –log-prefix="INPUT "

iptables -A OUTPUT -o $IF_PUB -j LOG –log-prefix="OUTPUT "

iptables -A FORWARD -j LOG –log-prefix="FORWARD "

Any packet not yet handled by the previous rules will be logged based on which chain in the filter table it is observed at. Note that there are only logging rules for the filter table. There's no need for logging rules in the other tables since anything that doesn't match in those will reach one of the chains in the filter table anyway. These rules will pre-fix the log entry with the name of the chain it was logged in. The log file is /var/log/firewall and automatically rolls over when it gets large. The previous log is re-named to firewall-date and gzipped. The log entries are a single line per item, see the following example of two lines from my log:

Oct 25 16:46:46 firewallhostname kernel: INPUT IN=eth1 OUT= MAC=00:03:47:af:35:9f:00:d0:88:01:00:95:08:00 SRC=10.0.0.155 DST=10.0.0.1 LEN=48 TOS=0x00 PREC=0x00 TTL=127 ID=31207 DF PROTO=TCP SPT=1645 DPT=135 WINDOW=64240 RES=0x00 SYN URGP=0

Oct 25 16:46:47 firewallhostname kernel: INPUT IN=eth1 OUT= MAC=00:03:47:af:35:9f:00:d0:88:01:00:95:08:00 SRC= 10.0.0.155 DST= 10.0.0.1 LEN=48 TOS=0x00 PREC=0x00 TTL=127 ID=31307 DF PROTO=TCP SPT=1645 DPT=135 WINDOW=64240 RES=0x00 SYN URGP=0

This shows two attempts by the host at 10.0.0.155 to connect to port tcp/135 (Windows networking) on my firewall. Both entries were logged in the INPUT chain of the filter table.

Whereas the -j ACCEPT rules in the filter table stop the packet from being further processed in the chain containing that rule, the -j LOG rules do not. The packet gets logged and it continues to be processed in the current chain.

When There Is Too Much Being Logged

My firewall is connected to a network that also hosts a DHCP server. If I use the logging as shown above then every DHCP packet gets logged. The network in question is very busy with DHCP traffic so it pollutes the log badly. So, before specifying the log rules I insert the following rule:

iptables -A INPUT -i $IF_PUB -p udp –sport bootps -j DROP

This causes all UDP traffic with the DHCP source port to be dropped in the bit bucket. Adding that rule before the logging removes the DHCP traffic from the logs. If there is other traffic polluting your logs and is not relevant to your monitoring then add similar rules before the logging rules.

Before Applying The Policy

The next part of my script reflects the philosophy I described above. If I added no more rules then the remaining packets would reach the policy for the filter chain and would all be dropped. However, I already have open ports on the router so it removes nothing from the discovery process if I now drop remaining packets. That's part of my reason for permitting ping. So, I chose to be a good TCP citizen as well:

iptables -A INPUT -p tcp -j REJECT –reject-with tcp-reset

Any remaining packets that are TCP protocol will be rejected with a TCP reset (RST) message. This is the normal behaviour of the TCP protocol when a connection is received on a port that has no listening service.

Anything left over is handled by the policy and dropped. I should also add a rule to handle UDP in the similarly "standard" way by responding with a ICMP port unreachable message.

Blocking Specific Problem Sources

You may find that your firewall or other logs indicate you are being repeatedly accessed by some host in some manner that is not permitted. For example, there may be a host poking your web server with requests your web server doesn't have content for. Your mail filtering may be handling lots of unsolicited traffic from one source. You can use NetFilter to cut them off at the pass so to speak. The cost is that those sources are now blocked from legitimate use of your services. I find that to be a tolerable expense, after all, the source is trying to attack me.

I put my blocking rules at the very top of my rule chains. That way the traffic they filter is discarded first and before any other processing that I know isn't applicable to it anyway. Also, the blocking rules have to be high enough that they aren't subverted by rules that identify the traffic and re-route it. For example, it is pointless attempting to block all traffic from a specific IP address at a later rule than an accept rule that will match the same traffic for a different reason (e.g. smtp accept).

I have three blocking rule sets on my firewall. One for protocols, one for source networks and one for source hosts. I added the protocols one most recently to exclude protocols known to be used maliciously. For example, I block IRC completely because it is frequently used to control botnets and I have no current use for IRC:

iptables -A INPUT -p tcp –dport irc -j DROP

iptables -A INPUT -p udp –dport irc -j DROP

iptables -A INPUT -p tcp –dport irc-serv -j DROP

iptables -A INPUT -p udp –dport irc-serv -j DROP

iptables -A INPUT -p tcp –dport ircs -j DROP

iptables -A INPUT -p udp –dport ircs -j DROP

These discard TCP and UDP IRC, IRC server and Secure IRC traffic.

An example of my rule to block a specific IP host is:

iptables -A INPUT -i $IF_PUB -s 10.220.231.236 -j REJECT –reject-with icmp-host-prohibited

This rejects traffic arriving on the public interface from IP address 10.220.231.236. I chose to reject the traffic by responding that the host is blocked, you could just drop the packet instead and make your firewall a black hole for the problem host.

A blocked network is similar:

iptables -A INPUT -i $IF_PUB -s 10.67.232.0/24 -j REJECT –reject-with icmp-net-prohibited

This one rejects traffic arriving at the public interface that has a source address on the 10.67.232.0/24 network. This time the traffic is rejected with an ICMP network prohibited message.

Monitoring a NetFilter Firewall

Now that the firewall is configured we need to consider how we monitor it for problems. I've already shown the logging that can be generated but iptables can be used to dump the statistics for the various rules:

iptables -L -v

iptables -t nat -L -v

The first command provides a verbose list of the rules in each chain in the (default) filter table. The verbose listing provides the hit and byte counts for the rules. The second command does the same for the rules in the chains of the NAT table. Here's example output for the filter table:

Chain INPUT (policy DROP 2707 packets, 1083K bytes)

pkts bytes target prot opt in out source destination 0 0 DROP tcp — any any anywhere anywhere tcp dpt:irc 0 0 DROP udp — any any anywhere anywhere udp dpt:irc 0 0 DROP tcp — any any anywhere anywhere tcp dpt:irc-serv 0 0 DROP udp — any any anywhere anywhere udp dpt:irc-serv 0 0 DROP tcp — any any anywhere anywhere tcp dpt:ircs 0 0 DROP udp — any any anywhere anywhere udp dpt:ircs 0 0 REJECT all — eth1 any 10.67.232.0/24 anywhere reject-with icmp-net-prohibited 0 0 REJECT all — eth1 any 10.220.231.236 anywhere reject-with icmp-host-prohibited 2169 524K ACCEPT all — lo any anywhere anywhere 226K 38M ACCEPT all — eth0 any 192.168.1.0/24 anywhere 224K 26M ACCEPT all — eth1 any anywhere anywhere state RELATED,ESTABLISHED 0 0 ACCEPT icmp — any any anywhere anywhere icmp echo-reply 0 0 ACCEPT icmp — any any anywhere anywhere icmp destination-unreachable 0 0 ACCEPT icmp — any any anywhere anywhere icmp time-exceeded 14647 640K ACCEPT icmp — any any anywhere anywhere icmp echo-request limit: avg 1/sec burst 5 9 432 ACCEPT tcp — eth1 any anywhere 10.0.0.1 tcp dpt:2202 4350 1459K DROP udp — eth1 any anywhere anywhere udp spt:bootps 3576 1103K LOG all — eth1 any anywhere anywhere LOG level warning prefix `INPUT ' 950 47785 REJECT tcp — any any anywhere anywhere reject-with tcp-reset Chain FORWARD (policy DROP 7 packets, 1400 bytes) pkts bytes target prot opt in out source destination 1302K 681M ACCEPT all — eth1 eth0 anywhere anywhere state RELATED,ESTABLISHED 1229K 253M ACCEPT all — eth0 eth1 anywhere anywhere 411 21920 ACCEPT tcp — eth1 any anywhere anywhere state NEW,RELATED,ESTABLISHED tcp dpt:smtp 1 48 ACCEPT tcp — eth1 any anywhere anywhere state NEW,RELATED,ESTABLISHED tcp dpt:pop3 681 39308 ACCEPT tcp — eth1 any anywhere anywhere state NEW,RELATED,ESTABLISHED tcp dpt:http 0 0 LOG all — any any anywhere anywhere LOG level warning prefix `FORWARD ' Chain OUTPUT (policy DROP 0 packets, 0 bytes) pkts bytes target prot opt in out source destination 2169 524K ACCEPT all — any lo anywhere anywhere 246K 23M ACCEPT all — any eth0 anywhere 192.168.1.0/24 220K 43M ACCEPT all — any eth1 anywhere anywhere 0 0 LOG all — any eth1 anywhere anywhere LOG level warning prefix `OUTPUT '


And for the NAT table:


Chain PREROUTING (policy ACCEPT 238K packets, 25M bytes) pkts bytes target prot opt in out source destination 407 21724 DNAT tcp — eth1 any anywhere 10.0.0.1 tcp dpt:smtp to:192.168.1.254 1 48 DNAT tcp — eth1 any anywhere 10.0.0.1 tcp dpt:pop3 to:192.168.1.254 681 39308 DNAT tcp — eth1 any anywhere 10.0.0.1 tcp dpt:http to:192.168.1.253 Chain POSTROUTING (policy ACCEPT 74279 packets, 5074K bytes) pkts bytes target prot opt in out source destination 16058 979K SNAT all — any eth1 192.168.1.0/24 anywhere to:10.0.0.1 Chain OUTPUT (policy ACCEPT 57342 packets, 4244K bytes) pkts bytes target prot opt in out source destination


You can see the number of packets and bytes that matched the policy and the number of packets and bytes that matched each rule for each chain in each table. We can look for some of the highlights and decide if some rules can be optimised. You can see that the firewall has observed 253MB of traffic forwarded from my private network and seen 681MB incoming for sessions established from my private network. It's interesting that the out/in ratio should be so high. You would expect most traffic to be small outbound requests and large inbound responses. My mail and web servers aren't attracting a lot of traffic.


Take a look at how useful my drop bootp (DHCP) rule is. It dropped 4350 packets. If the rule did not exist or was after the log rule then I'd have 4350 extra log lines that were of no interest.


Leftovers


You can use iptables to create rules that accept input on one-port and re-direct the traffic to a different port:


iptables -t nat -A PREROUTING -i $IF_PUB -d $IP_PUB -p tcp –dport 444 -j DNAT –to 192.168.1.254:443


iptables -A FORWARD -m state –state NEW,ESTABLISHED,RELATED -o $IF_PRV -p tcp –dport 443 -j ACCEPT


Imagine there's a SSL web interface to the mail server on 192.168.1.254. Let's say you already have something using port 443 on the firewall, say SSL access to the web server on 192.168.1.253. Well, we can use iptables to make port 444 on the public side of the firewall transfer traffic to the https port on the mail server. Now, we can access the web mail at http://firewall.public.address:444/


The Final Script


So, here's a init ready script for SuSE Linux versions to configure a firewall as described above. Create /etc/init.d/firewall and paste the following text into it then save it. Change the file's mode to executable and use chkconfig firewall on to enable the script at init time (/etc/init.d/firewall start to start the script now). Be sure to disable any other firewall script if you use this one:


#! /bin/bash
# Copyright (c) 2005
#
# Author: David Mair
#
# /etc/init.d/firewall
#
### BEGIN INIT INFO
# Provides: firewall
# Required-Start: $network syslog
# Required-Stop:
# Should-Stop:
# Default-Start: 3 4 5
# Default-Stop: 0 1 2 6
# Short-Description: Firewall configuration
### END INIT INFO

##############################################################################
# DEFAULT POLICY
SetDefaultPolicy() {
    # Drop everything
    iptables -P INPUT DROP
    iptables -P OUTPUT DROP
    iptables -P FORWARD DROP
}

##############################################################################
# FLUSH TABLES
FlushTables() {
    iptables -F -t nat
    iptables -F -t mangle
    iptables -F -t filter
    iptables -X
}

##############################################################################
# ROUTING
EnableRouting() {
    echo 1 > /proc/sys/net/ipv4/ip_forward
}

DisableRouting() {
    echo 0 > /proc/sys/net/ipv4/ip_forward
}

##############################################################################
# FORWARDING
SetForwardingRules() {
    iptables -A FORWARD -i $IF_PUB -o $IF_PRV -m state –state ESTABLISHED,RELATED -j ACCEPT
    iptables -A FORWARD -i $IF_PRV -o $IF_PUB -j ACCEPT
}

##############################################################################
# LOOPBACK
SetLoopbackRules() {
    # Allow everything
    iptables -A INPUT -i lo -j ACCEPT
    iptables -A OUTPUT -o lo -j ACCEPT
}

##############################################################################
# PRIVATE INTERFACES
SetPrivateInterfaceRules() {
    # Allow everything
    iptables -A INPUT -i $IF_PRV -s $NET_PRV -j ACCEPT
    iptables -A OUTPUT -o $IF_PRV -d $NET_PRV -j ACCEPT
}

#############################################################################
# PUBLIC INTERFACES
SetPublicInterfaceRules() {
    iptables -A INPUT -i $IF_PUB -m state –state ESTABLISHED,RELATED -j ACCEPT
    iptables -A OUTPUT -o $IF_PUB -j ACCEPT
}

##############################################################################
# SOURCE NAT
EnableSourceNAT() {
    # Then source NAT everything else
    iptables -t nat -A POSTROUTING -s $NET_PRV -o $IF_PUB -j SNAT –to $IP_PUB
}

# Various ICMP
SetICMP_Open() {
    iptables -A INPUT -p icmp –icmp-type 0 -j ACCEPT
    iptables -A INPUT -p icmp –icmp-type 3 -j ACCEPT
    iptables -A INPUT -p icmp –icmp-type 11 -j ACCEPT
    iptables -A INPUT -p icmp –icmp-type 8 -m limit –limit 1/second -j ACCEPT
}

# SSH (on a non-standard port)
SetSSH_Open() {
    iptables -A INPUT -i $IF_PUB -p tcp -d $IP_PUB –dport 2202 -j ACCEPT
}

##############################################################################
# Destination NAT

# smtp
SetSMTP_DNAT() {
    iptables -t nat -A PREROUTING -i $IF_PUB -d $IP_PUB -p tcp –dport smtp -j DNAT –to 192.168.1.254
    iptables -A FORWARD -m state –state NEW,ESTABLISHED,RELATED -i $IF_PUB -p tcp –dport smtp -j ACCEPT
}

# pop3
SetPOP3_DNAT() {
    iptables -t nat -A PREROUTING -i $IF_PUB -d $IP_PUB -p tcp –dport pop3 -j DNAT –to 192.168.10.254
    iptables -A FORWARD -m state –state NEW,ESTABLISHED,RELATED -i $IF_PUB -p tcp –dport pop3 -j ACCEPT
}

# Webmail (444->443)
SetWebmail_DNAT() {
    iptables -t nat -A PREROUTING -i $IF_PUB -d $IP_PUB -p tcp –dport 444 -j DNAT –to 192.168.10.254:443
    iptables -A FORWARD -m state –state NEW,ESTABLISHED,RELATED -o $IF_PRV -p tcp –dport 443 -j ACCEPT
}

# http
SetHTTP_DNAT() {
    iptables -t nat -A PREROUTING -i $IF_PUB -d $IP_PUB -p tcp –dport http -j DNAT –to 192.168.10.253
    iptables -A FORWARD -m state –state NEW,ESTABLISHED,RELATED -i $IF_PUB -p tcp –dport http -j ACCEPT
}

# Blocked protocols
SetBlockedProtocols() {
    # Block all normal irc (used by botnets)
    iptables -A INPUT -p tcp –dport irc -j DROP
    iptables -A INPUT -p udp –dport irc -j DROP
    iptables -A INPUT -p tcp –dport irc-serv -j DROP
    iptables -A INPUT -p udp –dport irc-serv -j DROP
    iptables -A INPUT -p tcp –dport ircs -j DROP
    iptables -A INPUT -p udp –dport ircs -j DROP
}

# Blocked hosts
SetBlockedHosts() {
    iptables -A INPUT -i $IF_PUB -s 10.220.231.236 -j REJECT –reject-with icmp-host-prohibited
    iptables -A FORWARD -i $IF_PUB -s 10.220.231.236 -j REJECT –reject-with icmp-host-prohibited
}

# Blocked networks
SetBlockedNetworks() {
    iptables -A INPUT -i $IF_PUB -s 10.220.232.0/24 -j REJECT –reject-with icmp-net-prohibited
    iptables -A FORWARD -i $IF_PUB -d $IP_PUB -s 10.220.232.0/24 -j REJECT –reject-with icmp-net-prohibited
}

# Specify things to drop before logging
SetPrelogDropRules() {
    # DHCP
    iptables -A INPUT -i $IF_PUB -p udp –sport bootps -j DROP
}

# Log those on the public interface
SetLoggingRules() {
    iptables -A INPUT -i $IF_PUB -j LOG –log-prefix="INPUT   "
    iptables -A OUTPUT -o $IF_PUB -j LOG –log-prefix="OUTPUT  "
    iptables -A FORWARD -j LOG –log-prefix="FORWARD "
#    iptables -t nat -A PREROUTING -i $IF_PUB -j LOG –log-prefix="nPre    "
#    iptables -t nat -A POSTROUTING -o $IF_PUB -j LOG –log-prefix="nPost   "
#    iptables -t nat -A OUTPUT -o $IF_PUB -j LOG –log-prefix="NAT OUT "
}

# Drop them all
SetDropRules() {
    # Reset tcp connection attempts on all other ports
    # This is the standard TCP behaviour for a closed port. Reading
    # suggests there is no value in stealthing ports and since some are
    # open on this host it doesn't seem to matter. Therefore, let's be a
    # good TCP citizen
    iptables -A INPUT -p tcp -j REJECT –reject-with tcp-reset
}

##############################################################################
# SCRIPT ENTRY POINT

echo -n "Firewall configuration…"
echo $1

##############################################################################
# ENVIRONMENT

# Private interface
IF_PRV=eth0
IP_PRV=192.168.1.1
NET_PRV=192.168.1.0/24

# Public interface
IF_PUB=eth1
IP_PUB=10.0.0.1
NET_PUB=10.0.0.0/24

# Others
ANYWHERE=0.0.0.0/0

. /etc/rc.status
rc_reset

##############################################################################
# COMMAND LINE

case "$1" in
    start)
        SetDefaultPolicy
        FlushTables

        EnableRouting

        SetBlockedProtocols
        SetBlockedNetworks
        SetBlockedHosts

        SetForwardingRules

        SetLoopbackRules
        SetPrivateInterfaceRules
        SetPublicInterfaceRules

        EnableSourceNAT

        SetICMP_Open
        SetSSH_Open

        SetSMTP_DNAT
        SetPOP3_DNAT
        SetWebmail_DNAT
        SetHTTP_DNAT

        SetPrelogDropRules
        SetLoggingRules
        SetDropRules
        ;;

    stop)
        SetDefaultPolicy
        FlushTables

        SetPrivateInterfaceRules
        SetPublicInterfaceRules
        ;;

    restart)
        $0 stop
        $0 start
        ;;

    *)
        ;;
esac

rc_exit
 

gssftp login without Kerberos authentication 150 150 Roderick Derks

gssftp login without Kerberos authentication

Log in on gssftp server without the need of using Kerberos authentication:

-bash-3.00$ vi /etc/xinetd.d/gssftp
# default: off
# description: The kerberized FTP server accepts FTP connections \
#              that can be authenticated with Kerberos 5.
service ftp
{
disable = no
flags           = REUSE
socket_type     = stream
wait            = no
user            = root
server          = /usr/kerberos/sbin/ftpd
#server_args    = -l -a
server_args     = -l
log_on_failure  += USERID
}

I had to use it on RedHat5.

Cloverleaf: install custom Perl modules 150 150 Roderick Derks

Cloverleaf: install custom Perl modules

Since 1999 I've been working in the Information Technology business. In these years I've seen a lot of bad software that makes you go crazy. That really makes you appreciate the great software that's out there. For instance VMware and Quovadx Cloverleaf software.

I haven't written any articles about Cloverleaf because it's really a niche market product. It's being used in a lot of hospitals around the world, also the hopital I'm working at. For around 8 years now. Cloverleaf is a intelligent message broker. It makes it fairly easy to connect one system to another system, or one system to many other systems. Almost everything is possible when it comes to message translating and controlling the routes. In my hospital the Cloverleaf plays a crucial role in getting information in the right place on time.

One of the great things is that Cloverleaf uses Perl. That is why I started to learn this language and this was a wise choice because this made my life as a network- and system engineer so much easier. But this all is not what I want to share here.

Cloverleaf is installed on a linux machine in our hospital. We used to run it on Windows but we switched, needless to say I'm really happy with this even though the Windows machine was not so bad at all. But I'm getting of track again. So linux has it's perl environment and Cloverleaf installs its own Perl installation in it's program folder. One of my newly created scripts needs to run in the Cloverleaf Perl environment, and the scripts needs a CPAN module.

Installing the Perl mudule in Cloverleaf Perl environment

I had problems installing this CPAN in the Cloverleaf Perl environment because the searchpaths in @INC were incorrect. While installing the module I got this error:

-bash-3.00$ perl Makefile.PL
Checking if your kit is complete…
Looks good
Warning: PERL_LIB (/work/jerickso/quovadx_dev/qdx5.6P/integrator/lib/perl5/5.8.8) seems not to be a perl library directory
(Exporter.pm not found) at /quovadx/qdx5.6/integrator/lib/perl5/5.8.8/ExtUtils/MM_Unix.pm line 1668.
Have /quovadx/qdx5.6/integrator/lib/perl5/5.8.8/i686-linux/Config.pm expected /work/jerickso/quovadx_dev/qdx5.6P/integrator/lib/perl5/5.8.8/i686-linux/Config.pm
Your perl and your Config.pm seem to have different ideas about the
architecture they are running on.
Perl thinks: [i686-linux]
Config says: [i686-linux]
This may or may not cause problems. Please check your installation of perl
if you have problems building this extension.
Writing Makefile for Net::Telnet
-bash-3.00$ make
make: *** No rule to make target `/work/jerickso/quovadx_dev/qdx5.6P/integrator/lib/perl5/5.8.8/i686-linux/Config.pm', needed by `Makefile'.  Stop.

So what now? I changed the environment variable @INC for perl so that the right libraries would be found:

-bash-3.00$ export PERL5LIB=/quovadx/qdx5.6/integrator/lib/perl5/5.8.8

-bash-3.00$ make clean
rm -f \
*.a core \
core.[0-9] blib/arch/auto/Net/Telnet/extralibs.all \
core.[0-9][0-9] Telnet.bso \
pm_to_blib.ts core.[0-9][0-9][0-9][0-9] \
Telnet.x  \
perl tmon.out \
*.o pm_to_blib \
blib/arch/auto/Net/Telnet/extralibs.ld blibdirs.ts \
core.[0-9][0-9][0-9][0-9][0-9] *perl.core \
core.*perl.*.? Makefile.aperl \
perl Telnet.def \
core.[0-9][0-9][0-9] mon.out \
libTelnet.def perlmain.c \
perl.exe so_locations \
Telnet.exp
rm -rf \
blib
mv Makefile Makefile.old > /dev/null 2>&1
-bash-3.00$ perl Makefile.PL
Checking if your kit is complete…
Looks good
Writing Makefile for Net::Telnet
-bash-3.00$ make
cp lib/Net/Telnet.pm blib/lib/Net/Telnet.pm
Manifying blib/man3/Net::Telnet.3
-bash-3.00$ make test
PERL_DL_NONLAZY=1 /quovadx/qdx5.6/integrator/bin/perl588 "-MExtUtils::Command::MM" "-e" "test_harness(0, 'blib/lib', 'blib/arch')" t/*.t
t/select….ok                                                              
All tests successful.
Files=1, Tests=3,  0 wallclock secs ( 0.00 cusr +  0.03 csys =  0.03 CPU)
-bash-3.00$ make install
mkdir /work: Permission denied at /quovadx/qdx5.6/integrator/lib/perl5/5.8.8/ExtUtils/Install.pm line 112
make: *** [pure_site_install] Error 13

We need root rights. As user root:

[root@ezhcom02 ~]# visudo
hci     ALL=(ALL) ALL

As user HCI:
-bash-3.00$ sudo make install
Password:
Installing /work/jerickso/quovadx_dev/qdx5.6P/integrator/lib/perl5/site_perl/5.8.8/Net/Telnet.pm
Installing /work/jerickso/quovadx_dev/qdx5.6P/integrator/man/man3/Net::Telnet.3
Writing /work/jerickso/quovadx_dev/qdx5.6P/integrator/lib/perl5/site_perl/5.8.8/i686-linux/auto/Net/Telnet/.packlist
Appending installation info to /work/jerickso/quovadx_dev/qdx5.6P/integrator/lib/perl5/5.8.8/i686-linux/perllocal.pod

As user root:
[root@ezhcom02 ~]# cp /work/jerickso/quovadx_dev/qdx5.6P/integrator/lib/perl5/site_perl/5.8.8/Net/Telnet.pm /quovadx/qdx5.6/integrator/lib/perl5/site_perl/5.8.8/Net/
cp: overwrite `/quovadx/qdx5.6/integrator/lib/perl5/site_perl/5.8.8/Net/Telnet.pm'? y

As user root:
[root@ezhcom02 ~]# visudo
#hci     ALL=(ALL) ALL

As user HCI I can now run the script that needs this module:
-bash-3.00$ /quovadx/qdx5.6/integrator/bin/perl /quovadx/qdx5.6/integrator/ezh_scripts/bin/restart_windows_service.pl -c ezhappl04 -u "elisabeth\username" -p **** -s AstraiaHL7Server

Cloverleaf Alert Manager

Now the last problem:  I would like to start this perl script from the Alert Manager inside Cloverleaf, but it doesn't. You first have to do one more action. Start the perl script from a Bash Shell script and add the PERL5LIB variabele. Start this shell script from the Alert manager.

[root@ezhcom02 ~] vi restart_windows_service.sh
export PERL5LIB=/quovadx/qdx5.6/integrator/lib/perl5/5.8.8
/usr/bin/perl /quovadx/qdx5.6/integrator/ezh_scripts/bin/restart_windows_service.pl $1 $2 $3 "$4" $5 $6 $7 "$8" >/tmp/restartwindowsservice 2>&1

That's it. It took me hours to find this solution, but it saves me work every day.


————————

nvt maar leukvoorlater:

#regel dat de HCI user de juiste PERL ENV heeft:
# foreach $key (sort(keys %ENV)) {
#          #print $key, '=', $ENV{$key}, "\n";
#          $$key = "$ENV{$key}";
# }

# if ( $HOME =~ "hci" ) {
#    use lib "/usr/lib/perl5/5.8.5";
#    use lib "/usr/lib/perl5/vendor_perl/5.8.5/i386-linux-thread-multi";
#    use lib "/usr/lib/perl5/vendor_perl/5.8.5/i386-linux-thread-multi/ModPerl";
#    use lib "/usr/lib/perl5/5.8.5/i386-linux-thread-multi";
# }
 

Tip: client configuration to expand memory to be able to read large smatfiles: -Xmx256m

Linux: tcp keep alive setting 150 150 Roderick Derks

Linux: tcp keep alive setting

Sometimes it’s handy to change the time interval that Linux has to check tcp connection statusses.

Current setting in seconds:
# cat /proc/sys/net/ipv4/tcp_keepalive_time

Change to 15 minutes:
# echo 900 > /proc/sys/net/ipv4/tcp_keepalive_time

This is not permanent ..  and you must place in an init proc…
# vi /etc/sysctl.conf
net.ipv4.tcp_keepalive_time =900

The following settings I used for Cloverleaf software for memory management:

# vi /etc/sysctl.conf
kernel.shmmax=2147483648
#kernel.sem=250 32000 100 256
kernel.sem=300 40000 150 384
fs.file-max=65536

Kwalijke vooroordelen over IT-ers 150 150 Roderick Derks

Kwalijke vooroordelen over IT-ers

Vandaag een aardig stukje gelezen over de vooroordelen die (vooral) managers hebben over IT-ers. En dan hebben we  het over  de stereo-typering dat “IT-personeel doorgaans bestaat uit sociaal brakke nerds met een ego-probleem”. Ik heb dit soort uitspraken laatst nog uit de mond van een recent in mijn bedrijf aangenomen manager gehoord. Toen ben ik dan ook heel boos geworden.

read more

Linux commands – A practical reference 150 150 Roderick Derks

Linux commands – A practical reference

Command Description
apropos whatis Show commands pertinent to string. See also threadsafe
man -t man | ps2pdf – > man.pdf make a pdf of a manual page
which command Show full path name of command
time command See how long a command takes
time cat Start stopwatch. Ctrl-d to stop. See also sw
nice info Run a low priority command (The “info” reader in this case)
renice 19 -p $$ Make shell (script) low priority. Use for non interactive tasks
dir navigation
cd – Go to previous directory
cd Go to $HOME directory
(cd dir && command) Go to dir, execute command and return to current dir
pushd . Put current dir on stack so you can popd back to it
alias l=’ls -l –color=auto’ quick dir listing
ls -lrt List files by date. See also newest and find_mm_yyyy
ls /usr/bin | pr -T9 -W$COLUMNS Print in 9 columns to width of terminal
find -name ‘*.[ch]’ | xargs grep -E ‘expr’ Search ‘expr’ in this dir and below. See also findrepo
find -type f -print0 | xargs -r0 grep -F ‘example’ Search all regular files for ‘example’ in this dir and below
find -maxdepth 1 -type f | xargs grep -F ‘example’ Search all regular files for ‘example’ in this dir
find -maxdepth 1 -type d | while read dir; do echo $dir; echo cmd2; done Process each item with multiple commands (in while loop)
find -type f ! -perm -444 Find files not readable by all (useful for web site)
find -type d ! -perm -111 Find dirs not accessible by all (useful for web site)
locate -r ‘file[^/]*\.txt’ Search cached index for names. This re is like glob *file*.txt
look reference Quickly search (sorted) dictionary for prefix
grep –color reference /usr/share/dict/words Highlight occurances of regular expression in dictionary
archives and compression
gpg -c file Encrypt file
gpg file.gpg Decrypt file
tar -c dir/ | bzip2 > dir.tar.bz2 Make compressed archive of dir/
bzip2 -dc dir.tar.bz2 | tar -x Extract archive (use gzip instead of bzip2 for tar.gz files)
tar -c dir/ | gzip | gpg -c | ssh user@remote ‘dd of=dir.tar.gz.gpg’ Make encrypted archive of dir/ on remote machine
find dir/ -name ‘*.txt’ | tar -c –files-from=- | bzip2 > dir_txt.tar.bz2 Make archive of subset of dir/ and below
find dir/ -name ‘*.txt’ | xargs cp -a –target-directory=dir_txt/ –parents Make copy of subset of dir/ and below
( tar -c /dir/to/copy ) | ( cd /where/to/ && tar -x -p ) Copy (with permissions) copy/ dir to /where/to/ dir
( cd /dir/to/copy && tar -c . ) | ( cd /where/to/ && tar -x -p ) Copy (with permissions) contents of copy/ dir to /where/to/
( tar -c /dir/to/copy ) | ssh -C user@remote ‘cd /where/to/ && tar -x -p’ Copy (with permissions) copy/ dir to remote:/where/to/ dir
dd bs=1M if=/dev/sda | gzip | ssh user@remote ‘dd of=sda.gz’ Backup harddisk to remote machine
rsync (Network efficient file copier: Use the –dry-run option for testing)
rsync -P rsync://rsync.server.com/path/to/file file Only get diffs. Do multiple times for troublesome downloads
rsync –bwlimit=1000 fromfile tofile Locally copy with rate limit. It’s like nice for I/O
rsync -az -e ssh –delete ~/public_html/ remote.com:’~/public_html’ Mirror web site (using compression and encryption)
rsync -auz -e ssh remote:/dir/ . && rsync -auz -e ssh . remote:/dir/ Synchronize current directory with remote one
ssh (Secure SHell)
ssh $USER@$HOST command Run command on $HOST as $USER (default command=shell)
ssh -f -Y $USER@$HOSTNAME xeyes Run GUI command on $HOSTNAME as $USER
scp -p -r $USER@$HOST: file dir/ Copy with permissions to $USER’s home directory on $HOST
ssh -g -L 8080:localhost:80 root@$HOST Forward connections to $HOSTNAME:8080 out to $HOST:80
ssh -R 1434:imap:143 root@$HOST Forward connections from $HOST:1434 in to imap:143
wget (multi purpose download tool)
(cd dir/ && wget -nd -pHEKk http://www.pixelbeat.org/cmdline.html) Store local browsable version of a page to the current dir
wget -c http://www.example.com/large.file Continue downloading a partially downloaded file
wget -r -nd -np -l1 -A ‘*.jpg’ http://www.example.com/dir/ Download a set of files to the current directory
wget ftp://remote/file[1-9].iso/ FTP supports globbing directly
wget -q -O- http://www.pixelbeat.org/timeline.html | grep ‘a href’ | head Process output directly
echo ‘wget url’ | at 01:00 Download url at 1AM to current dir
wget –limit-rate=20k url Do a low priority download (limit to 20KB/s in this case)
wget -nv –spider –force-html -i bookmarks.html Check links in a file
wget –mirror http://www.example.com/ Efficiently update a local copy of a site (handy from cron)
networking (Note ifconfig, route, mii-tool, nslookup commands are obsolete)
ethtool eth0 Show status of ethernet interface eth0
ethtool –change eth0 autoneg off speed 100 duplex full Manually set ethernet interface speed
iwconfig eth1 Show status of wireless interface eth1
iwconfig eth1 rate 1Mb/s fixed Manually set wireless interface speed
iwlist scan List wireless networks in range
ip link show List network interfaces
ip link set dev eth0 name wan Rename interface eth0 to wan
ip link set dev eth0 up Bring interface eth0 up (or down)
ip addr show List addresses for interfaces
ip addr add 1.2.3.4/24 brd + dev eth0 Add (or del) ip and mask (255.255.255.0)
ip route show List routing table
ip route add default via 1.2.3.254 Set default gateway to 1.2.3.254
tc qdisc add dev lo root handle 1:0 netem delay 20msec Add 20ms latency to loopback device (for testing)
tc qdisc del dev lo root Remove latency added above
host pixelbeat.org Lookup DNS ip address for name or vice versa
hostname -i Lookup local ip address (equivalent to host `hostname`)
whois pixelbeat.org Lookup whois info for hostname or ip address
netstat -tupl List internet services on a system
netstat -tup List active connections to/from system
windows networking (Note samba is the package that provides all this windows specific networking support)
smbtree Find windows machines. See also findsmb
nmblookup -A 1.2.3.4 Find the windows (netbios) name associated with ip address
smbclient -L windows_box List shares on windows machine or samba server
mount -t smbfs -o fmask=666,guest //windows_box/share /mnt/share Mount a windows share
echo ‘message’ | smbclient -M windows_box Send popup to windows machine (off by default in XP sp2)
text manipulation (Note sed uses stdin and stdout. Newer versions support inplace editing with the -i option)
sed ‘s/string1/string2/g’ Replace string1 with string2
sed ‘s/\(.*\)1/\12/g’ Modify anystring1 to anystring2
sed ‘/ *#/d; /^ *$/d’ Remove comments and blank lines
sed ‘:a; /\\$/N; s/\\\n//; ta’ Concatenate lines with trailing \
sed ‘s/[ \t]*$//’ Remove trailing spaces from lines
sed ‘s/\([`”$\]\)/\\\1/g’ Escape shell metacharacters active within double quotes
seq 10 | sed “s/^/      /; s/ *\(.\{7,\}\)/\1/” Right align numbers
sed -n ‘1000{p;q}’ Print 1000th line
sed -n ‘10,20p;20q Print lines 10 to 20
sed -n ‘s/.*<title>\(.*\)<\/title>.*/\1/ip;T;q Extract title from HTML web page
sed -i 42d ~/.ssh/known_hosts Delete a particular line
sort -t. -k1,1n -k2,2n -k3,3n -k4,4n Sort IPV4 ip addresses
echo ‘Test’ | tr ‘[:lower:]’ ‘[:upper:]’ Case conversion
tr -dc ‘[:print:]’ < /dev/urandom Filter non printable characters
history | wc -l Count lines
set operations (Note you can export LANG=C for speed. Also these assume no duplicate lines within a file)
sort file1 file2 | uniq Union of unsorted files
sort file1 file2 | uniq -d Intersection of unsorted files
sort file1 file1 file2 | uniq -u Difference of unsorted files
sort file1 file2 | uniq -u Symmetric Difference of unsorted files
join -t’\0′ -a1 -a2 file1 file2 Union of sorted files
join -t’\0′ file1 file2 Intersection of sorted files
join -t’\0′ -v2 file1 file2 Difference of sorted files
join -t’\0′ -v1 -v2 file1 file2 Symmetric Difference of sorted files
math
echo ‘(1 + sqrt(5))/2’ | bc -l Quick math (Calculate φ). See also bc
echo ‘pad=20; min=64; (100*10^6)/((pad+min)*8)’ | bc More complex (int) e.g. This shows max FastE packet rate
echo ‘pad=20; min=64; print (100E6)/((pad+min)*8)’ | python Python handles scientific notation
echo ‘pad=20; plot [64:1518] (100*10**6)/((pad+x)*8)’ | gnuplot -persist Plot FastE packet rate vs packet size
echo ‘obase=16; ibase=10; 64206’ | bc Base conversion (decimal to hexadecimal)
echo $((0x2dec)) Base conversion (hex to dec) ((shell arithmetic expansion))
units -t ‘100m/9.58s‘ ‘miles/hour’ Unit conversion (metric to imperial)
units -t ‘500GB’ ‘GiB’ Unit conversion (SI to IEC prefixes)
units -t ‘1 googol’ Definition lookup
seq 100 | (tr ‘\n’ +; echo 0) | bc Add a column of numbers. See also add and funcpy
calendar
cal -3 Display a calendar
cal 9 1752 Display a calendar for a particular month year
date -d fri What date is it this friday. See also day
[ $(date -d “tomorrow” +%d) = “01” ] || exit exit a script unless it’s the last day of the month
date –date=’25 Dec’ +%A What day does xmas fall on, this year
date –date=’@2147483647′ Convert seconds since the epoch (1970-01-01 UTC) to date
TZ=’:America/Los_Angeles’ date What time is it on West coast of US (use tzselect to find TZ)
echo “mail -s ‘get the train’ P@draigBrady.com < /dev/null” | at 17:45 Email reminder
echo “DISPLAY=$DISPLAY xmessage cooker” | at “NOW + 30 minutes” Popup reminder
locales
printf “%’d\n” 1234 Print number with thousands grouping appropriate to locale
BLOCK_SIZE=\’1 ls -l get ls to do thousands grouping appropriate to locale
echo “I live in `locale territory`” Extract info from locale database
LANG=en_IE.utf8 locale int_prefix Lookup locale info for specific country. See also ccodes
locale | cut -d= -f1 | xargs locale -kc | less List fields available in locale database
recode (Obsoletes iconv, dos2unix, unix2dos)
recode -l | less Show available conversions (aliases on each line)
recode windows-1252.. file_to_change.txt Windows “ansi” to local charset (auto does CRLF conversion)
recode utf-8/CRLF.. file_to_change.txt Windows utf8 to local charset
recode iso-8859-15..utf8 file_to_change.txt Latin9 (western europe) to utf8
recode ../b64 < file.txt > file.b64 Base64 encode
recode /qp.. < file.txt > file.qp Quoted printable decode
recode ..HTML < file.txt > file.html Text to HTML
recode -lf windows-1252 | grep euro Lookup table of characters
echo -n 0x80 | recode latin-9/x1..dump Show what a code represents in latin-9 charmap
echo -n 0x20AC | recode ucs-2/x2..latin-9/x Show latin-9 encoding
echo -n 0x20AC | recode ucs-2/x2..utf-8/x Show utf-8 encoding
CDs
gzip < /dev/cdrom > cdrom.iso.gz Save copy of data cdrom
mkisofs -V LABEL -r dir | gzip > cdrom.iso.gz Create cdrom image from contents of dir
mount -o loop cdrom.iso /mnt/dir Mount the cdrom image at /mnt/dir (read only)
cdrecord -v dev=/dev/cdrom blank=fast Clear a CDRW
gzip -dc cdrom.iso.gz | cdrecord -v dev=/dev/cdrom – Burn cdrom image (use dev=ATAPI -scanbus to confirm dev)
cdparanoia -B Rip audio tracks from CD to wav files in current dir
cdrecord -v dev=/dev/cdrom -audio *.wav Make audio CD from all wavs in current dir (see also cdrdao)
oggenc –tracknum=’track’ track.cdda.wav -o ‘track.ogg’ Make ogg file from wav file
disk space (See also FSlint)
ls -lSr Show files by size, biggest last
du -s * | sort -k1,1rn | head Show top disk users in current dir. See also dutop
df -h Show free space on mounted filesystems
df -i Show free inodes on mounted filesystems
fdisk -l Show disks partitions sizes and types (run as root)
rpm -q -a –qf ‘%10{SIZE}\t%{NAME}\n’ | sort -k1,1n List all packages by installed size (Bytes) on rpm distros
dpkg-query -W -f=’${Installed-Size;10}\t${Package}\n’ | sort -k1,1n List all packages by installed size (KBytes) on deb distros
dd bs=1 seek=2TB if=/dev/null of=ext3.test Create a large test file (taking no space). See also truncate
> file truncate data of file or create an empty file
monitoring/debugging
tail -f /var/log/messages Monitor messages in a log file
strace -c ls >/dev/null Summarise/profile system calls made by command
strace -f -e open ls >/dev/null List system calls made by command
ltrace -f -e getenv ls >/dev/null List library calls made by command
lsof -p $$ List paths that process id has open
lsof ~ List processes that have specified path open
tcpdump not port 22 Show network traffic except ssh. See also tcpdump_not_me
ps -e -o pid,args –forest List processes in a hierarchy
ps -e -o pcpu,cpu,nice,state,cputime,args –sort pcpu | sed ‘/^ 0.0 /d’ List processes by % cpu usage
ps -e -orss=,args= | sort -b -k1,1n | pr -TW$COLUMNS List processes by mem usage. See also ps_mem.py
ps -C firefox-bin -L -o pid,tid,pcpu,state List all threads for a particular process
ps -p 1,2 List info for particular process IDs
last reboot Show system reboot history
free -m Show amount of (remaining) RAM (-m displays in MB)
watch -n.1 ‘cat /proc/interrupts’ Watch changeable data continuously
system information (see also sysinfo) (‘#’ means root access is required)
uname -a Show kernel version and system architecture
head -n1 /etc/issue Show name and version of distribution
cat /proc/partitions Show all partitions registered on the system
grep MemTotal /proc/meminfo Show RAM total seen by the system
grep “model name” /proc/cpuinfo Show CPU(s) info
lspci -tv Show PCI info
lsusb -tv Show USB info
mount | column -t List mounted filesystems on the system (and align output)
grep -F capacity: /proc/acpi/battery/BAT0/info Show state of cells in laptop battery
# dmidecode -q | less Display SMBIOS/DMI information
# smartctl -A /dev/sda | grep Power_On_Hours How long has this disk (system) been powered on in total
# hdparm -i /dev/sda Show info about disk sda
# hdparm -tT /dev/sda Do a read speed test on disk sda
# badblocks -s /dev/sda Test for unreadable blocks on disk sda
interactive (see also linux keyboard shortcuts)
readline Line editor used by bash, python, bc, gnuplot, …
screen Virtual terminals with detach capability, …
mc Powerful file manager that can browse rpm, tar, ftp, ssh, …
gnuplot Interactive/scriptable graphing
links Web browser
xdg-open . open a file or url with the registered desktop application
miscellaneous
alias hd=’od -Ax -tx1z -v’ Handy hexdump. (usage e.g.: • hd /proc/self/cmdline | less)
alias realpath=’readlink -f’ Canonicalize path. (usage e.g.: • realpath ~/../$USER)
set | grep $USER Search current environment
touch -c -t 0304050607 file Set file timestamp (YYMMDDhhmm)
python -m SimpleHTTPServer Serve current directory tree at http://$HOSTNAME:8000/
Nagios plugins available for download 491 250 Roderick Derks

Nagios plugins available for download

Almost two years ago I uploaded some nagios plugins to nagiosexchange.com, nowadays monitoringexchange.com. I make the downloads available via my own website too so if you are looking for some plugins these might be handy:

  • APC check_apc_ups
    Plugin to check the status of different APS UPS systems.
  • APC check_apc_env
    Plugin to check the temperature and humidity status via snmp of a APC Environmental module.
  • MGE check_mge_ups
    Plugin to check the status of an MGE UPS system.
  • check_snmp_barracuda
    Plugin to check the status of the three mail queues of the barracude mail and spam filter system.
  • check_snmp_brocade
    Plugin to check the status of Brocade SAN switches Brocade 4900  and Brocade 5000
  • check_snmp_nortel_core
    Plugin to check the status of Nortel core routers (Passport systems or currently named Ethernet Routing Switch).

They are available for download here. Enjoy! And leave a reply if you use them, I'd much appreciate that 🙂

VMware: Deploy Template grayed out 150 150 Roderick Derks

VMware: Deploy Template grayed out

You can run into the problem when you want to deploy a VM from a template the options are greyed out, even after
restarting the vCenter services.
PowerCLI to the rescue:  
$templates = Get-Template *
foreach($item in $templates){
$template = $item.Name

#Convert Template back to VM
Set-Template $template -ToVM -RunAsync
#Convert Template back to template :S
$vmview = Get-VM $template | Get-View
$vmview.MarkAsTemplate()

}
Thnx to ictfreak
Nokia 6230i streetrace record 150 150 Roderick Derks

Nokia 6230i streetrace record

My old Nokia is replaced by a less older Nokia 6230i and it comes with a few games. I started to play Streetrace and it’s pretty addictive. So last night in stead of going to bed to get some really needed sleep I started playing and scored a new record. Good enough for me to take a picture and publish it on the web. I read in a forum about people who were faster, some of the times mentioned are so fast that it’s very likely that they are fake. And no one ever showed a photo. And that’s the only proof that counts for me! 😉 So my time for the coast is 1:12.85.

November 19 2009: Last night I did it. After hundreds and hundreds of attempts I set a new record: 1:12:82 !

See you can beat this! (maybe harder is to get hold of a Nokia 6230i).

Oh yes, I started playing Golf Tour too: 79 is my best (-13).

    Your Name (required)

    Your Email (required)

    Subject

    Your Message

      Your Name (required)

      Your Email (required)

      Subject

      Your Message