IT

Centreon: services doubled 150 150 Roderick Derks

Centreon: services doubled

Number of services in Centreon doubled, just the number not the actual amount of services. Nagios has no strange behaviour.

Problem is in the NDO database. Solution:

  • Stop Nagios
  • Empty all tables of NDO (via phpmyadmin)
  • Start Nagios via the Centreon frontend
RESXTOP: how to reduce output 150 150 Roderick Derks

RESXTOP: how to reduce output

To reduce the size of your esxtop output by selectively include only the statistics you are interested in. This way you save a lot of time collecting the data and this makes the command usefull for monitoring systems like Nagios. Here’s how you can narrow down the collected stats for easier analysis and smaller output:

  1. Enter ESXTOP in interactive mode on the Service Console by simply typing esxtop at the # prompt
  2. Switch to a component you are NOT interested in capturing statistics on by pressing the corresponding menu option (c: ESX cpu, m: ESX memory, d: ESX disk adapter, u: ESX disk device, v: ESX disk VM).
  3. Press f when viewing the component you do not want to capture.  A list of fields will be displayed.  You can toggle the fields on and off by pressing the letter corresponding to each field.  An * indicates that the field is on.  You want to turn off all of the fields you don’t want to collect.
  4. Repeat steps 2 & 3 for the remaining components, leaving only what you want to capture.
  5. Switch to the component you want to capture in batch mode and repeat step #3, except you will now enable what you want to capture.
  6. Press W (capital W – case sensitive) to write out the ESXTOP configuration file.  You can accept the default or create new configuration files.  You may want to create a CPU-only config file, memory-only, and so forth.
  7. Press CTRL+C to stop ESXTOP.
  8. Now, invoke ESXTOP in batch mode, calling your updated or new configuration file you created in step #6 using the -c switch.  Here’s an example:# esxtop -b -d 30 -n 480 -c .esxtopcpustats > /tmp/esxtop_cpu_stats.csv where .esxtopcpustats is an ESXTOP config file with only CPU stats.  -d sets your capture interval to 30 seconds, and -n sets the number of samples to 480 (or 4 hours with a delay of 30 seconds).

Once your capture is complete you can replay the sampling in ESXTOP using replay mode (-R), or you can copy the .csv to a Windows system and use PERFMON or Excel to analyze the stats.  If using PERFMON or Excel you will notice that the system summary information displayed at the top of an interactive ESXTOP session is included in the output (console memory, console cpu, etc.).  As far as I know, there is no way to disable this, nor would you want to as it includes the time stamp necessary to interpret your data.

It is possible to use the vSphere CLI or the vSphere Management Assistant (vMA) to run RESXTOP, a version of ESXTOP designed for remote administration of ESXi or ESX.  You may note, however, RESXTOP from the vSphere CLI only works from a Linux client.  Using either of these tools will help you to automate ESXTOP statistics collection from multiple hosts using customized configuration files and put in Nagios.

Thnx to vmtoday.com.

Nagios Centreon Install on Centos 5.5 150 150 Roderick Derks

Nagios Centreon Install on Centos 5.5

Configure CentOS 5.5

cd /etc/sysconfig/network-scripts/
cp /etc/sysconfig/network-scripts/ifcfg-eth0  /etc/sysconfig/network-scripts/ifcfg-eth0.bak
scp root@10.0.2.16:/etc/sysconfig/network-scripts/ifcfg-eth0  .
cat ifcfg-eth0.bak |grep -i hw >> ifcfg-eth0
cat ifcfg-eth0.dhcp |grep -i Intel >> ifcfg-eth0
vi ifcfg-eth0
service network stop
service network start
vi /etc/resolv.conf
dig google.nl
yum update
vi /etc/sysconfig/network
service network reload
yum update
vi /etc/sysconfig/selinux
chkconfig –level 123456 ip6tables off
shutdown -r  0

install vmtools

yum install perl
mount /dev/cdrom /mnt/
ls /mnt/VMwareTools-8.3.2-257589.tar.gz /tmp/
cp /mnt/VMwareTools-8.3.2-257589.tar.gz /tmp/
umount /mnt/
yum install make gcc kernel-devel
tar xvzf VMwareTools-8.3.2-257589.tar.gz
cd vmware-tools-distrib/
./vmware-install.pl
service network restart

add repo

yum install wget
wget http://packages.sw.be/rpmforge-release/rpmforge-release-0.5.1-1.el5.rf.x86_64.rpm
mv rpmforge-release-0.5.1-1.el5.rf.x86_64.rpm /tmp/
rpm –import http://apt.sw.be/RPM-GPG-KEY.dag.txt
rpm -i /tmp/rpmforge-release-0.5.1-1.el5.rf.x86_64.rpm
yum check-update
yum update

PHP

yum install php
yum install php-pear
pear channel-update pear.php.net
pear upgrade-all

Other rpm's

yum -y install perl-Config-IniFiles
yum install libpng libpng-devel libjpg libjpg-devel
yum install perl-RRD-Simple perl-DBI perl-DBD-MySQL gd fontconfig-devel libjpeg-devel libpng-devel gd-devel perl-GD php php-mysql php-gd perl-DBI perl-DBD-MySQL gd fontconfig-devel libjpeg-devel libpng-devel gd-devel perl-GD rrdtool perl-rrdtool perl-Crypt-DES perl-Digest-SHA1 perl-Socket6 perl-IO-Socket-INET6 net-snmp net-snmp-libs php-snmp dmidecode lm_sensors perl-Net-SNMP net-snmp-perl perl-Digest-HMAC net-snmp-utils openssl-devel perl-DBD-MySQL mysql-server mysql-devel sudo php-ldap php-xml
yum install php-pear -y
yum install php-soap.x86_64 -y
yum install -y vixie-cron
service crond start
yum install -y sendmail
service sendmail on
chkconfig –level 35 sendmail on

[Don't edit the php.ini anymore]
vi /etc/php.ini
;;;;;;;;;;;;;;;;;;;;;;
; Dynamic Extensions ;
;;;;;;;;;;;;;;;;;;;;;;

;RRD
extension=ldap.so

Download monitoringsoftware packages

cd /tmp
yum -y install wget
wget http://prdownloads.sourceforge.net/sourceforge/nagios/nagios-3.2.3.tar.gz
wget http://downloads.sourceforge.net/project/nagios/ndoutils-1.x/ndoutils-1.4b9/ndoutils-1.4b9.tar.gz?r=http%3A%2F%2Fsourceforge.net%2Fprojects%2Fnagios%2Ffiles%2Fndoutils-1.x%2F&ts=1288691664&use_mirror=ovh
wget http://prdownloads.sourceforge.net/sourceforge/nagiosplug/nagios-plugins-1.4.15.tar.gz
wget http://download.centreon.com/index.php?id=143

Config services

cp /etc/snmp/snmpd.conf /etc/snmp/snmpd.conf.orig
scp root@10.0.2.11:/etc/snmp/snmpd.conf /etc/snmp/snmpd.conf
service snmpd start
chkconfig –level 35 snmpd on
chkconfig –level 345 mysqld on
chkconfig –level 345 httpd on
yum install -y ntp
chkconfig –level 345 ntpd on
scp root@10.0.2.8:/etc/ntp.conf /etc/ntp.conf
cat /etc/ntp.conf
service ntpd start
exit

Install Nagios

system-config-securitylevel-tui
service iptables stop
service httpd start
cd /tmp/
tar xvzf nagios-3.2.3.tar.gz
cd nagios-3.2.3
adduser nagios
mkdir /usr/local/nagios
chown nagios:nagios /usr/local/nagios
grep "^User" /etc/httpd/conf/httpd.conf
/usr/sbin/groupadd nagcmd
/usr/sbin/usermod -G nagcmd apache
/usr/sbin/usermod -G nagcmd nagios
./configure –prefix=/usr/local/nagios –with-command-group=nagcmd
make all
make install
make install-init
make install-config
make install-webconf
chkconfig –add nagios
chkconfig –level 35 nagios on

# Set some nagios rights
chown nagios:nagcmd /usr/local/nagios/var/rw
chown nagios:nagcmd /usr/local/nagios/var/rw/nagios.cmd
su – nagios
cd /usr/local/nagios/var
mkdir rw
exit

service nagios start
/usr/local/nagios/bin/nagios -v /usr/local/nagios/etc/nagios.cfg

# configure apache and access
vi /etc/httpd/conf.d/nagios.conf

Nagios/Apache authetication against local htpasswd file
——————————————————-
# vi /etc/httpd/conf.d/nagios.conf

ScriptAlias /nagios/cgi-bin "/usr/local/nagios/sbin"

<Directory "/usr/local/nagios/sbin">

   AuthType Basic
   AuthName "Nagios Access"

   Options Indexes FollowSymLinks
   AllowOverride None
   Order allow,deny
   Allow from all
   Require valid-user

   # Lokale autenticatie file ipv LDAP
   AuthUserFile /usr/local/nagios/etc/apache/htpasswd.users

</Directory>

Alias /nagios "/usr/local/nagios/share"

<Directory "/usr/local/nagios/share">
   Options None
   AllowOverride AuthConfig
   Allow from all

</Directory>

# Add First User and create htpasswd file:
mkdir /usr/local/nagios/etc/apache
htpasswd -c /usr/local/nagios/etc/apache/htpasswd.users nagiosadmin
# Add Second User and use existing htpasswd file:
htpasswd /usr/local/nagios/etc/apache/htpasswd.users roderick
——————————————————————————-

Nagios/Apache authetication against Windows Active Directory W2003R2 and higher
——————————————————————————-

# vi /etc/httpd/conf.d/nagios.conf

ScriptAlias /nagios/cgi-bin "/usr/local/nagios/sbin"

<Directory "/usr/local/nagios/sbin">

   AuthBasicProvider ldap
   AuthType Basic
   AuthzLDAPAuthoritative on
   AuthName "Nagios Access"

   Options Indexes FollowSymLinks
   AllowOverride None
   Order allow,deny
   Allow from all
   Require valid-user

   # Active Directory LDAP
   AuthLDAPURL "ldap://elisabeth.nl:389/ou=Users,ou=admins,dc=elisabeth,dc=nl?sAMAccountName?sub?(objectClass=*)"
   AuthLDAPBindDN "cn=sa_nagios,ou=Service Accounts,ou=admins,dc=elisabeth,dc=nl"
   AuthLDAPBindPassword "wwwwachtwoord"
</Directory>

Alias /nagios "/usr/local/nagios/share"

<Directory "/usr/local/nagios/share">
   Options None
   AllowOverride AuthConfig
   Allow from all

</Directory>
——————————————————————————-

service httpd reload
mkdir htpasswd -c /usr/local/nagios/etc/apache
mkdir /usr/local/nagios/etc/apache
htpasswd -c /usr/local/nagios/etc/apache/htpasswd.users nagiosadmin
htpasswd /usr/local/nagios/etc/apache/htpasswd.users roderick
htpasswd /usr/local/nagios/etc/apache/htpasswd.users nagioslook
vi /usr/local/nagios/etc/cgi.cfg

# install nagios plugins
cd /tmp/
tar xvzf nagios-plugins-1.4.15.tar.gz
cd nagios-plugins-1.4.15
./configure
make install

Install NDO

cd ..
tar xvzf ndoutils-1.4b9.tar.gz
cd ndoutils-1.4b9
ls
./configure –prefix=/usr/local/nagios/ –enable-mysql –disable-pgsql –with-ndo2db-user=nagios –with-ndo2db-group=nagios
make
cp ./src/ndomod-3x.o /usr/local/nagios/bin/ndomod.o
cp ./src/ndo2db-3x /usr/local/nagios/bin/ndo2db
chmod 774 /usr/local/nagios/bin/ndo*
chown nagios:nagios /usr/local/nagios/bin/ndo*
cp config/ndo* /usr/local/nagios/etc/

vi /usr/local/nagios/etc/nagios.cfg
event_broker_options=-1
broker_module=/usr/local/nagios/bin/ndomod.o config_file=/usr/local/nagios/etc/ndomod.cfg

vi /etc/init.d/ndo2db
voeg script toe onderaan bladzijde

chmod +x /etc/init.d/ndo2db
chkconfig –add ndo2db
chkconfig –level 345 ndo2db on

MySQL

service mysqld start
chkconfig –level 345 mysqld on
/usr/bin/mysqladmin -u root password 'root'
mysql -u root -p

Install Centreon and prequisits

visudo
#Defaults    requiretty

yum -y install mail
yum install php-mbstring
service httpd reload
mkdir /etc/cron.d

cd /tmp/
tar xvzf centreon-2.1.9.tar.gz
cd centreon-2.1.9
./install.sh -i

During install these paths are needed:

/usr/lib64/perl5/vendor_perl/5.8.8/x86_64-linux-thread-multi/RRDs.pm
/usr/share/pear/PEAR.php
/usr/local/nagios/bin/ndomod.o

#configure Nagios for NDO

cp /usr/local/nagios/etc/ndo2db.cfg-sample /usr/local/nagios/etc/ndo2db.cfg

# vi /usr/local/nagios/etc/ndo2db.cfg
socket_type=tcp
tcp_port=5669
db_name=ndo
db_prefix=nagios_
db_user=ndo
db_pass=ndo

/usr/local/nagios/bin/ndo2db -c /usr/local/nagios/etc/ndo2db.cfg

system-config-security
port 3306 en 5668 openen (tcp en ik heb ook udp geopend)

cp /usr/local/nagios/etc/ndomod.cfg-sample /usr/local/nagios/etc/ndomod.cfg
vi /usr/local/nagios/etc/ndomod.cfg
output_type=tcpsocket
output=127.0.0.1
tcp_port=5668

chmod 777 /usr/local/nagios/var
chmod 777 /usr/local/nagios/var/rw

service centstorage start
service centcore start

NDO Startup script /etc/init.d/ndo2db

#!/bin/sh
#
#
# chkconfig: 345 99 01
# description: Nagios to mysql
#
# Author : Gaëtan Lucas
# Realase : 07/02/08
# Version : 0.1 b
# File : ndo2db
# Description: Starts and stops the Ndo2db daemon
# used to provide network services status in a database.
#

status_ndo ()
{
if ps -p $NdoPID > /dev/null 2>&1; then
return 0
else
return 1
fi

return 1
}

printstatus_ndo()
{
if status_ndo $1 $2; then
echo "ndo (pid $NdoPID) is running…"
else
echo "ndo is not running"
fi
}

killproc_ndo ()
{
echo "kill $2 $NdoPID"
kill $2 $NdoPID
}

pid_ndo ()
{
if test ! -f $NdoRunFile; then
echo "No lock file found in $NdoRunFile"
echo -n " checking runing process…"
NdoPID=`ps h -C ndo2db -o pid`
if [ -z "$NdoPID" ]; then
echo " No ndo2db process found"
exit 1
else
echo " found process pid: $NdoPID"
echo -n " reinit $NdoRunFile …"
touch $NdoRunFile
chown $NdoUser:$NdoGroup $NdoRunFile
echo "$NdoPID" > $NdoRunFile
echo " done"
fi
fi

NdoPID=`head $NdoRunFile`
}

# Source function library
# Solaris doesn't have an rc.d directory, so do a test first
if [ -f /etc/rc.d/init.d/functions ]; then
. /etc/rc.d/init.d/functions
elif [ -f /etc/init.d/functions ]; then
. /etc/init.d/functions
fi

prefix=/usr/local/nagios
exec_prefix=${prefix}
NdoBin=${exec_prefix}/bin/ndo2db
NdoCfgFile=${prefix}/etc/ndo2db.cfg
NdoRunFile=${prefix}/var/ndo2db.run
NdoLockDir=/var/lock/subsys
NdoLockFile=ndo2db.lock
NdoUser=nagios
NdoGroup=nagios

# Check that ndo exists.
if [ ! -f $NdoBin ]; then
echo "Executable file $NdoBin not found. Exiting."
exit 1
fi

# Check that ndo.cfg exists.
if [ ! -f $NdoCfgFile ]; then
echo "Configuration file $NdoCfgFile not found. Exiting."
exit 1
fi

# See how we were called.
case "$1" in

start)
echo -n "Starting ndo:"
touch $NdoRunFile
chown $NdoUser:$NdoGroup $NdoRunFile
$NdoBin -c $NdoCfgFile
if [ -d $NdoLockDir ]; then
touch $NdoLockDir/$NdoLockFile;
fi
ps h -C ndo2db -o pid > $NdoRunFile
if [ $? -eq 0 ]; then
echo " done."
exit 0
else
echo " failed."
$0 stop
exit 1
fi
;;

stop)
echo -n "Stopping ndo: "

pid_ndo
killproc_ndo

# now we have to wait for ndo to exit and remove its
# own NdoRunFile, otherwise a following "start" could
# happen, and then the exiting ndo will remove the
# new NdoRunFile, allowing multiple ndo daemons
# to (sooner or later) run
#echo -n 'Waiting for ndo to exit .'
for i in 1 2 3 4 5 6 7 8 9 10 ; do
if status_ndo > /dev/null; then
echo -n '.'
sleep 1
else
break
fi
done
if status_ndo > /dev/null; then
echo
echo 'Warning – ndo did not exit in a timely manner'
else
echo 'done.'
fi

rm -f $NdoRunFile $NdoLockDir/$NdoLockFile
;;

status)
pid_ndo
printstatus_ndo ndo
;;

restart)
$0 stop
$0 start
;;

*)
echo "Usage: ndo {start|stop|restart|status}"
exit 1
;;

esac

# End of this script

ESXi vSphere: enable SNMP agent 150 150 Roderick Derks

ESXi vSphere: enable SNMP agent

Install the RCLI on a pc/laptop/server. Got to the command prompt and enable SNMP.

vicfg-snmp.pl –server <your_host> -t snmptrapsystem@port/community -c communitystring

(@port is optional in this command) – you can also set the community with the -c switch

vicfg-snmp.pl –server <your_host> -E = enable the service
vicfg-snmp.pl –server <your_host> -E = stop the service

vicfg-snmp.pl –server <your_host> -T = test your setup
vicfg-snmp.pl –server <your_host> -s = show your setup
vicfg-snmp.pl –server <your_host> -r = reset your config

(tested on a 4.1 ESXi host)

Enable SNMP on Speedtoch ST716V5 150 150 Roderick Derks

Enable SNMP on Speedtoch ST716V5

Login via telnet and tyoe the followig commands:

service system modify name=SNMP_AGENT state=enabled log=enabled
snmp community add securityname=ROCommunity communityname=public

On a linux machine use snmpwalk and version 1 to execute a query:
# snmpwalk -v1 -c public 192.168.0.1

ESXi unattended installation 4.0 4.1 USB 150 150 Roderick Derks

ESXi unattended installation 4.0 4.1 USB

Create an unattended installation for ESXi Installable version

This article is usable for the ESXi 4.0 and 4.1 version. For 4.1 you need to do more then in 4.0 because of a file that needs te be uncompressed in a special way, see the end of the article where I have written the new info.

The ESXi installer scripts are located in the install.tgz file (ESX 4.0) or in the install.vgz file (4.1) in the root of the installation media. Opening this up (for 4.1 see below), we see 2 directories: sbin and usr. In sbin is the (b)Ash script that is called to kick off the ESXi installation, but it just calls to /usr/lib/vmware/installer/ThinESX.py, which in turn simply calls the Start method defined in ThinESXInstall.py in the same directory. This file defines a number of install steps, each of which is a method in yet another file, /usr/lib/vmware/installer/ThinESX/ThinESXInstallSteps.py. Most of the methods in that file call scripts in /usr/lib/vmware/installer/ThinESX/Dialogs to do the actual work. Once you unravel this, it’s clearly obvious that only one thing needs to be modified – the install steps defined in /usr/lib/vmware/installer/ThinESXInstall.py! Here’s what the default entry looks like, on lines 22/23:

Steps = [ WelcomeStep, LicenseStep, TargetSelectionStep, ConfirmStep, \
WriteStep, PostConfigStep, CompleteStep, RebootStep ]

The PostConfigStep does some important work, and doesn’t present any user dialogs anyway so it needs to stay. But I couldn’t give a damn about a welcome screen, a EULA acceptance (as if we’re not bound to that anyway by the license purchase), a target confirmation dialog, and a message telling me the install has completed. So stripping out the extraneous stuff, we are left with:

Steps = [ TargetSelectionStep, WriteStep, PostConfigStep, RebootStep ]

More info from VMWare about installing ESXi 4.1 can be found here.

ESXi 4.1

On a Linux workstation (Ubuntu)

  • mount the iso (i.e. using Navigator)
  • extract install.vgz
  • copy install.vgz into a new directory
  • Rename install.vgz to install.gz so gzip understands it
    # mv install.vgz to install.gz
  • gunzip install.gz
    # gunzip install.gz
  • I could not copy vmtar to my Ubuntu install so I copied install.gz to the esx server
    # scp install.gz root@esxhost:/tmp

On ESXi
In 4.1 the install.tgz file is suddenly replaced by a install.vgz file! What the hell is a .vgz file? VMware probably decided to use another packing method, it is probaly faster. We need another tool to unpack the files.

  • Use vmtar to convert the install to a normal tar format
    # cd /tmp
    # vmtar -x install -o install.tar

On a Linux workstation (Ubuntu)

  • copy the file to a linux workstation
    # scp root@esxhost:/tmp/install.tar
  • Untar install.tar
    # tar xvf install.tar
  • edit the file afer setting the write rights
    # chmod +w usr/lib/vmware/installer/ThinESXInstall.py
    # vi usr/lib/vmware/installer/ThinESXInstall.py  --> (Read the instructions above)
  • tar the files again and copy it to the ESXi host
    # tar cvf install.tar *
    # scp install.tar root@esxhost:/tmp/

On ESXi

  • Use vmtar to convert the install to a normal tar format
    # cd /tmp
    # vmtar -c install.tar -o install

On a Linux workstation (Ubuntu)

  • Zip the file
    # gzip install
  • Rename gzip to vgz
    # mv install.gz install.vgz

Copy install.vgz into the original ISO file. I did that using "Ultra Iso", that's a Windows application… Yeah I know…

Install from a USB drive

I was trying to install VMware esxi 3.5 on a Dell PowerVault 750N (sold as a nas box).  The box doesn’t have a CD drive so I had to get the esxi install on another way.  I found a couple how-to’s about booting from a usb thumb drive that used a different kernel, but by changing a few bits I was able to boot from a USB thumb drive directly to the ESXi install.

Items Used:
1. 8GB USB 2.0 thumb drive  ***Revised I had to use a 512 stick to get it working on 1 server
2. VMware-VMvisor-InstallerCD-3.5.0xxxx.i386.iso (extract iso to USB drive)
3. Syslinux-3.72 (unzip to temp location)

Procedure:
1. Format USB drive with FAT32 (I needed a 512MB USB drive formated FAT to get it to work on 1 server)
2. Extract VMware iso to USB drive
3. Extract Syslinux onto C: drive
4. Navigate to syslinux-3.72\win32 and run the following command
syslinux.exe -s -m -f -a e: (e: was my usb drive)
5. This will create a file called ldlinux.sys (hidden file so you need to view hidden to see it)
6. Navigate to the USB drive and rename isolinux.cfg to syslinux.cfg. You do not need to change anything in this file. The config file boots the mboot.c32 kernel that is included with the esxi install.
7. Make sure your server is set to boot from USB and you are good to go.

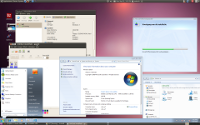
No More Windows: my Ubuntu Desktop setup 200 125 Roderick Derks

No More Windows: my Ubuntu Desktop setup

Yes, Microsoft released a patch which detected my Windows7 crack. No, I'm not going to try and find a new crack. No I'm not going to buy Windows7 after having to work for over 10 years with crappy Windows workstations. It's going to be Ubuntu!

It has a learning curve for me cause I'm familiar with Fedora and RedHat. Wanted to get out of the confortzone. So here are my experiences (Work In Progress):

Ubuntu 10.10 beta

[18-09-2010] I have serious Wireless LAN problems. I'm now going to use 10.4.1 to see if this is this an issue…

Ubuntu 10.4

Automatically start WIFI

Remove the password for the default keyring.

  • Go to: Applications > Accessoires > Passwords and Encryption Keys
  • Right click on Passwords Default
  • Enter current password and leave next two fields empty

Setup the proxy server

Synaptic
Open up your Synaptic package manager (usually as root), go to Settings-> Preference -> Network. Enter your proxy server details like : username:password@proxyserver.net, and put the proxy server port (usually 8080).

Command-line apt-get
Edit your /etc/bash.bashrc file as root.
Put these line at the end of your /etc/bash.bashrc file :

export http_proxy=http://username:password@proxyserver.net:port/
export ftp_proxy=http://username:password@proxyserver.net:port/

You can omit the username:password, if your proxy server has no password.

Amarok (MP3 player)

Install Amarok via Applications > Ubuntu Software Center (search for  Amarok)
To be able to create collections also install MySQL server and client.

MP3 and more formats support for Amarok:

sudo apt-get install libxine1-ffmpeg gstreamer0.10-plugins-ugly
sudo apt-get install kubuntu-restricted-extras

MP3 decoders for Ubuntu's default Rhythmbox Music Player
apt-get install gstreamer0.10-fluendo-mp3
apt-get install gstreamer0.10-plugins-ugly

Video

I installed VLC Media Player via the Ubuntu Software Centrer, VLC is handier when you use subtitles.
apt-get install gstreamer0.10-ffmpeg

Video Editing

Instead of Windows Movie Maker Live I use kdenlive. Installationprocedure for Ubuntu can be found here. And Oh My God, it's much better then Windows Movie Maker Live 🙂 You got more tracks to play with and so much more options and it's still easy to use.

Zimbra

Installed the zdesktop client and now using zimbranotify (more here) to alert me of new email. Had to execute these commands:

sudo apt-get install libsexy-dev sudo perl -MCPAN -e 'install ExtUtils::Depends' sudo perl -MCPAN -e 'install ExtUtils::PkgConfig' sudo perl -MCPAN -e 'install Gtk2::Sexy' sudo perl -MCPAN -e 'install Crypt::Simple' sudo apt-get install libgtk2-trayicon-perl libxml-simple-perl libcrypt-ssleay-perl sudo apt-get install mpg123  Command to run when new mail arrives: mpg123 /home/roderick/Music/Windows_Notify.wav 

Zimdicator:

  • sudo add-apt-repository ppa:sect2k/zimdicator
  • sudo apt-get update && sudo apt-get install zimdicator

Configure by invoking the command: zimdicator-config.py

Shutdown in one click

(Really a nice feauture in W7) Right click on a control panel and select "add..". In the Command edit box, enter one of the following five commands, depending on which launcher you are currently creating.

  • telinit 0 (shutdown)
  • telinit 6 (reboot)
  • /etc/acpi/hibernate.sh (hibernate)
  • /etc/acpi/sleepbtn.sh (sleep)
  • gnome-session-save –force-logout (log off)

Icons:
Add icon /usr/share/icons/Humanity/actions/32/application-exit.svg
Add icon /usr/share/icons/Humanity/actions/32/gnome-log-out.svg

Add to sudo config (visudo):

roderick ALL=(root) NOPASSWD: /sbin/telinit, /sbin/reboot, /sbin/shutdown 

VirtualBox

Installed VirtualBox and the VirtualBox GUI via the Ubuntu Sotware Center. I now run Windows 7 in a Virtual Machine. Yes I know… but I need it for my work to setup a remote session. The damn company don't care about Linux.
As a heavy VMware user I can say that VirtualBox is working great uptill now. Wohoo!

Connect to Windows/Samba Shares

$ sudo apt-get install smbf winbind $ sudo mkdir /mnt/music_please $ sudo vi /etc/nsswitch.conf      hosts:          files mdns4_minimal [NOTFOUND=return] wins dns mdns4  $ sudo /sbin/mount.cifs //freenas02/music_please /mnt/music_please  If you don't want that just root has read/write access then do this:  $ sudo id roderick uid=1000(roderick) gid=1000(roderick) groups=1000(roderick......  $ sudo vi /etc/fstab     //freenas02/music_please /mnt/music_please      cifs    defaults,uid=1000,gid=1000,credentials=/home/roderick/.smbcredentials   0 0  ~$ cat /home/roderick/.smbcredentials username=roderick password=pass 
vSphere 4.1: new features overview 150 150 Roderick Derks

vSphere 4.1: new features overview

I was in need of a shortlist of the new VMware ESX 4.1 features:

  • VMware vSphere 4.1 can support up to 3,000 virtual machines per cluster and 1,000 hosts per vCenter server, both roughly three times the limits in vSphere 4.0. The number of virtual machines per data centre now maxes out at 5,000, which is twice the previous limit.
  • Some enhancements to the vCLI command line interface allow for extra virtual machine controls
  • Some enhancements to the host profile capability permit finer-grained control over ESX servers.
  • Host lockdown mode and host power management have been improved.
  • Virtual machine serial ports can now be accessed over the network
  • Leverage Active Directory to control authentication to the ESX hosts themselves, rather than relying on local authentication or other methods.
  • Compression over swap during low memory situations (less I/O to the disk)
  • vMotion speed improvements
  • enhancements to Distributed Resource Scheduler's VM affinity rules – can help in situations where not every host in a cluster is identical or connected to the same networks. For instance, if only a few hosts have connections to a DMZ network, you can create rules that force DMZ-connected hosts to vMotion only to those hosts.
  • USB device mapping. It's now possible to map a USB device to a virtual machine and maintain that mapping even through a vMotion of the virtual machine
  • Storage I/O control per VM
  • Network bandwith control per VM
  • a functional boot-from-SAN manager for ESXi that can run over iSCSI, FCoE, and Fibre Channel
  • Virtual machines configured for FT can now play nice with DRS, for instance, allowing for load balancing of virtual machines that also require fault tolerance.
  • Windows clustering services can now be integrated with VMware's HA functions, ostensibly providing a deeper level of failover functionality in Windows environments.
  • SCSI locking not on LUN level but on Block level, a major improvement especially for VDI concepts.
  • ….
Zimbra installation guide for FC11 x64 150 150 Roderick Derks

Zimbra installation guide for FC11 x64

How to install Zimbra 6.0.7 on Fedora Core 11 x64 in an Virtual Machine on ESX4.1?

Pre Zimbra installation configuration

Install Fedora Core 11 with minimal requirements on a 20GB VMDK. Make sure you got enough space for future upgrades on the volume.

setenforce 0
service iptables stop
chkconfig –level 12345 iptables off

setup your network (including /etc/hosts and /etc/resolve)

service network status
chkconfig –level    345 network on

yum install -y kernel kernel-headers kernel-devel make gcc openssh-clients openssh-utils bind-utils

vi /etc/sysconfig/selinux
SELINUX=disabled

You can see Exim (MTA) is running on port 25, stop it and prevent it from starting again
netstat -an|grep 25
netstat -lptu
service exim stop
chkconfig –level 012345 exim    off
netstat -an|grep 25

Make sure DNS is working properly. Check your dig, dig -x and dig mx commands and solve issues.
Now you can install Zimbra.

Install vmtools. That's why we installed the kernel related rpm's and make and gcc.

Post Zimbra installation configuration

Got an error in the backend admin website while viewing mailqueues or server stats: Error code: service.FAILURE Details:soap:Receiver

Checked if it logging in via ssh was possible without getting a password question
ssh -vi .ssh/zimbra_identity -o strictHostKeyChecking=no zimbra@server.domain.nl -p 22

I got a password question so I reissued the certificates:
su – zimbra
cd /opt/zimbra/bin/
./zmsshkeygen
./zmupdateauthkeys

I still got the password question. Finally the problem was that I had forgotten to disable SELINUX.

To many mesages are logged in var/log/messages, seems to be a bug and solved in next releases. Workaround:
tail -f /var/log/messages
vi /etc/rsyslog.conf
– *.info;mail.none;authpriv.none;cron.none                /var/log/messages
+ *.info;mail.none;authpriv.none;cron.none;local0.none;local1.none                /var/log/messages

/etc/init.d/rsyslog restart
tail -f /var/log/messages

CPU spikes every minute: follow this guide.

VMware: ESXi upgrade 4.0 to 4.1 (USB) 150 150 Roderick Derks

VMware: ESXi upgrade 4.0 to 4.1 (USB)

Upgrade a single ESX1i 4.x host to a higher version by executing the following steps:

  1. On your laptop/pc install vSphere CLI
  2. Download an upgrade package like ESXi4.0-to-4.1.0-0.0.260247-release.zip
  3. Put the ESX host in maintenance mode.
  4. Open a MSDOS console on you laptop and goto C:\Program Files\VMware\VMware vSphere CLI\bin
  5. vihostupdate.pl –server 192.168.0.1 -i -b F:\upgrade-from-ESXi4.0-to-4.1.0-0.0.260247-release.zip
    Enter username: root
    Enter password:
    Please wait patch installation is in progress …
    The update completed successfully, but the system needs to be rebooted for the changes to be effective.
  6. Update your VI Client and login to the ESX server.

That' s it. I upgraded my free ESX version like this. You can also use vCenters host update utility.

    Your Name (required)

    Your Email (required)

    Subject

    Your Message

      Your Name (required)

      Your Email (required)

      Subject

      Your Message