IT

AndFTP and SFTP: create ssl certificate 150 150 Roderick Derks

AndFTP and SFTP: create ssl certificate

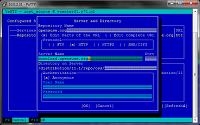
Create a secure way to transfer files to your network from wherever you are from your Android phone, like uploading photo’s directly to your server at home. Much faster then connecting your phone to the laptop.

This short guide is showing you how to create a key to use with a FTPS server (explicit FFTP over TLS/SSL). First you have install an FTP server as describbed.. I use Freenas7 because it’s so divers. Install AndFTP on your phone.

read more

Zimbra: backup mailboxes script 150 150 Roderick Derks

Zimbra: backup mailboxes script

Works on ZCS 7. Only active mailboxes from real active user accounts are backed up. Very simple, works great.

read more

Named issues solved 150 150 Roderick Derks

Named issues solved

When trying to sync zone files from master to slave DNS servers I got these errors:

Error:

dumping master file: tmp-7pVr9NGZO: open: permission denied

read more

Adito OpenVPN-ALS: a great VPN appliance 150 150 Roderick Derks

Adito OpenVPN-ALS: a great VPN appliance

A long time ago in 2005 I started using SSL-Explorer as my own private VPN appliance running on VMware. SSL-Explorer made it possible to easily access my complete network at home in a very secure and reliable way. At the time I wrote an article about how to set it up.

read more

VMworld 2011 Recap 150 200 Roderick Derks

VMworld 2011 Recap

Last week I visited VMorld 2011 in Copenhagen. Copenhagen is a great city, I was very pleasently surprised. Clean streets, friendly and very relaxed people, children who seem to look fairly happy, no fat people in hamburger restaurants, a lot of kids wear sporty clothes of their sportclub, public transport is organized well, no fights to get in or out a train or metro, good restaurants and great architecture and design. And at VMworld a lot of the served food was healthy. I like Copenhagen.

This VMworld was my fourth in a row and every year it proves to be an exiting event, this year too. I visited around 14 break-out sessions which were really great. Technical deep dives, Q&A sessions with experts and best practices that are really useable. Also attended spectaculair general sessions with talks about how VMware sees the near future.

What impressed me the most? I don't know were to start. When you look at the future the Datacenters will become automated. vClouds will be used by everyone, big and small businesses. All the manual work done nowadays will be automated. Installing hosts, configuring swithes, deploying VM's, creating secure networks for organizations using the same datacenter, all actions are automized. Repairing is old-school, automatically replacing is faster and therefor more efficient. And the datacenter lights will be turned on just once a week to replace some physical parts.

Around 2014 we'll have phsical hosts capable of having 2 physical CPU's with each 16 cores, 300GB of RAM and running around 320 VM's. Company's running 200 virtual servers only need two physical hosts.

When you look at new products VMware anounced the intelligent vCenter Operations 5.0 tool for monitoring datacenters, this promises to be a great tool. Operations relies on third party tools to deliver the monitoring results. I had some talks with the vCenter Operations developpers and guess what: 360° Viewpoint is fully compatible!

Other newly announced products Applblast, Horizon and Octopus will make a world of change: deploying the same software and sharing files anywhere, anytime, anyplace. And independent of the device and platform you are using. Run Microsoft's Office from an iPad, MAC, Linux and Android device and share your files within seconds with your collegues on the other side of the world.

Another great product: VMware Go. It makes an assessment of your physical hosts in your network, determines which host is most appropiate to install the VMware hypervisor on, then it replaces the current OS with the VMware hypervisor and installs back the original Operating System and Apps as a VM on this hypervisor. Incredible. Really cool for small and mid-size business. Even the Borg will be impressed with this assimilation technology.

The break-sessions gave me a lot of insight into (Virtual) Memory Management, DRS, HA, vStorage, Storage vMotion, automating ESXi deployment, vSphere best practices, and the list goes on. Also the caveats of stretched clusters and DR and Disaster Prevention were very interesting.

And I came in 4th with the NetApp Cycling race, 1/100 of a second behind #3 and 8/100 of #2. The winner got a week of training on Mallorca with the pro's, I missed it by 0.9 seconds. I shifted wrong.. damn.

Conclusion: exiting times are waiting us! The cloud is yours.

Install vSphere5 ESXi from USB 150 150 Roderick Derks

Install vSphere5 ESXi from USB

    Connect a USB pen drive to a Linux OS, in my case a Ubuntu.
    Download the vSphere 5 ESXi ISO installation file.
    On the Linux machine install syslinux and mboot.
    Execute the following commands:

# sudo apt-get install mbr syslinux # sudo /sbin/fdisk /dev/sdb # sudo umount /dev/sdb1 # sudo /sbin/mkfs.vfat -F 32 -n USB /dev/sdb1 # cd /tmp/ # sudo syslinux /dev/sdb1 # sudo install-mbr /dev/sdb # sudo mkdir /mnt/cdrom # sudo mkdir /mnt/usb # sudo mount -o loop /tmp/VMware-VMvisor-Installer-5.0.0-469512.x86_64.iso /mnt/cdrom/ # sudo mount /dev/sdb1 /mnt/usb/ # sudo cp -r /mnt/cdrom/* /mnt/usb/ # sudo mv /mnt/usb/isolinux.cfg /mnt/usb/syslinux.cfg # sudo vi /mnt/usb/syslinux.cfg 

In the file /usbdisk/syslinux.cfg, change the line APPEND -c boot.cfg to APPEND -c boot.cfg -p 1.

# sudo umount /mnt/usb # sudo umount /mnt/cdrom

Ready, says VMware.

But… When I put the USB drive in the server I get the BOOT prompt. The menu is not loaded correctly.

It has got something to do with that this syslinux kernel version needs another layout of the syslinux.cfg file. Untill I solve this issue I just type on the BOOT command prompt:

mboot.c32 -c boot.cfg -p 1 

This works.

Nagios: Monitor IBM DB2 database 150 150 Roderick Derks

Nagios: Monitor IBM DB2 database

Install perl DBI module

# perl -MCPAN -e 'install DBI'

Install the Application Development Client to be able to compile DBB:DB2 perl modules. Download it here:
http://www-01.ibm.com/support/docview.wss?rs=71&uid=swg21256079

To Install the DB2 Application Development Client you need the library libstdc++.so.5. On my Centos 5.5 installation it was missing. I installed it like this:

# rpm -q --whatprovides libstdc++.so.5 # yum -y install compat-libstdc++-33.i386 # find /usr/ -name libstdc++* 

Download the correct DB2 "Dataserver Runtime Client" and store it in /tmp, I used v9.7:
http://www-01.ibm.com/support/docview.wss?rs=4020&uid=swg21385217

To Install the DB2 Runtime Client you need the library libaio.so.1. On my Centos 5.5 installation it was missing. I installed it like this:

# rpm -q --whatprovides libaio.so.1 no package provides libaio.so.1 # yum -y install libaio.x86_64 # find /usr/lib64 -name libaio* # /usr/lib64/libaio.so.1
# cd /tmp # tar xvzf ibm_data_server_runtime_client_linuxx64_v97.tar.gz # cd rtcl # ./db2_install 

After the installation is finished succesfully you'll see this:

db2_install program completed successfully. 

Set environmental variable DB2_HOME:

# export DB2_HOME=/opt/IBM/db2/V9.7

Configure the DB2 Client. This step is needed to prevent error messages like:
SQL10007N Message "-1390" could not be retrieved.  Reason code: "3"
when trying to start /opt/ibm/db2/V9.7/bin/db2

# groupadd db2grp1 # groupadd db2fgrp1 # groupadd dasadm1 # useradd -g db2grp1  -m -d /home/db2inst1 db2inst1 # useradd -g db2fgrp1 -m -d /home/db2fenc1 db2fenc1 # useradd -g dasadm1  -m -d /home/dasusr1 dasusr1  # /opt/ibm/db2/V9.7/instance/db2icrt db2inst1 

Install perl DDB::DB2 module. Download the modules here: http://httpupdate37.cpanel.net/CPAN/authors/id/I/IB/IBMTORDB2/DBD-DB2-1.81.tar.gz

# cd /tmp # tar zvxf DBD-DB2-1.81.tar.gz # cd DBD-DB2-1.81 # perl Makefile.PL # make # make test # make install 

Wow, now we can connect to the database.

Get the Nagios plugin:

# cd /tmp # wget http://labs.consol.de/wp-content/uploads/2010/12/check_db2_health-1.0.3.tar.gz # tar xvzf check_db2_health-1.0.3.tar.gz # cd check_db2_health-1.0.3 # ./configure # make # make install 

Now the script is installed in the default Nagios libexec directory:

# ls /usr/local/nagios/libexec/check_db2_health 

Set the environmental setting so the library is found:

# LD_LIBRARY_PATH=/opt/ibm/db2/V9.7/lib64 

Check the database:

# check_db2_health --username=root --password=******* --hostname vcenter.r71.nl --mode=connection-time 

Make sure the database accepts connections. Login to the vCenter server using ssh and execute the following commands:

# /opt/db2/v9.7.2/adm/db2set DB2COMM=tcpip # /opt/db2/v9.7.2/bin/db2 update dbm cfg using svcename  # /opt/db2/v9.7.2/bin/db2  db2 => LIST ACTIVE DATABASES                             Active Databases  Database name                              = VCDB Applications connected currently           = 15 Database path                              = /storage/db/db2/home/db2inst1/db2inst1/NODE0000/SQL00001/

Beschikbare users:

db2 => GET CONTACTS    Name                           Type       Address                        Max Page Length  Description   ------------------------------ ---------- ------------------------------ ---------------- ------------------------------   db2inst1                       EMAIL      db2inst1@localhost                              Contact added by DB2 Setup Wizard

Login op linux als user db2inst1

~> su - db2inst1 ~> db2set DB2COMM=tcpip ~> db2 update dbm cfg using agentpri system ~> db2 force applications all ~> dbstop ~> dbstart  

Problem: when trying to connect the client to the database I get a Segmentation fault error. I'm having trouble solving this issue… Ideas are welcome!

Monitor vCenter Appliance (vCSA) via SNMP 200 125 Roderick Derks

Monitor vCenter Appliance (vCSA) via SNMP

As we all rely more and more on vCenter for managing datacenters with VMware ESX hosts and for delivering our virtual desktops, we have to be sure vCenter services are running smootly. So monitoring is important.

First there was only vCenter on a Windows host. Works fine. Monitoring was possible because you controlled the Windows box and the database. Now there is the new vCenter Virtual Appliance running on SuSE 11.1. Very interesting and probably the way to go in the future. But how to monitor the vCenter services?

For monitoring I mostly use Simple Network Monitoring Protocol (SNMP). Really great, not simple. The vCenter appliance has not got the SNMP daemon installed by default, so some activity is required. Glad we have root access to the machine. Here we go:

Check the Suse version:

# cat /etc/SuSE-release SUSE Linux Enterprise Server 11 (x86_64) VERSION = 11 PATCHLEVEL = 1 

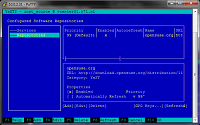
Add the repository of this Suse version to YAST, the Suse software manager tool. Use SSH to login to the vCenter server.

# yast 
  • Select Software > Software Repositiries
  • Select Add
  • Select Specify URL and select next
  • Add a Repository name and the URL http://download.opensuse.org/distribution/11.1/repo/oss/
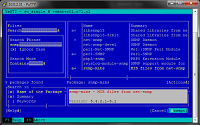
  • Add the SNMP software: go back to the initial YAST screen and select Software > Software Management
  • In the SEARCH PHRASE field type SNMP and press enter
  • Select net-snmp, dependencies are selected automatically (in vCSA 5.1 I broke the dependencies and this worked)
  • Select ACCEPT

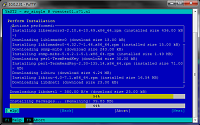
The software is installed. Quit YAST.

Allow the monitoring server to connect to the snmpd daemon:

# vi /etc/hosts.allow sshd: ALL : ALLOW snmpd: ALL : ALLOW ALL: KNOWN 

Start the SNMP daemon and make sure it starts after a reboot:

# service snmpd start # chkconfig snmpd on # vi /etc/snmp/snmpd.conf

Change

rwcommunity public 127.0.0.1

to

rwcommunity public

Now try a snmp quey from the monitoring server:

# snmpwalk -v2c -c public vcenter01.r71.nl SNMPv2-MIB::sysDescr.0 = STRING: Linux vcenter01.r71.nl 2.6.32.29-0.3-default SNMPv2-MIB::sysObjectID.0 = OID: NET-SNMP-TC::linux DISMAN-EVENT-MIB::sysUpTimeInstance = Timeticks: (169539) 0:28:15.39 SNMPv2-MIB::sysContact.0 = STRING: Roderick SNMPv2-MIB::sysName.0 = STRING: vcenter01.r71.nl SNMPv2-MIB::sysLocation.0 = STRING: R71 .. 

It works!

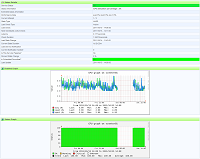
Now configure your monitoring tool. If you don't have a good monitoring tool (shame on you) then get 360° Viewpoint!
(next I'm trying to figure out how to monitor the DB2 database, will report back later when ready)


vCenter database reaches 4GB and stops 150 150 Roderick Derks

vCenter database reaches 4GB and stops

Problem: vCenter crashes also after a restart of the service. SQL Express is used (has a 4GB limit).

Event viewer error log:
CREATE DATABASE or ALTER DATABASE failed because the resulting cumulative database size would exceed your licensed limit of 4096 MB per database.

Solution:

Download a script from the VMware Website KB article for vCenter2 or vCenter4. Tested by me on vCenter5.

Install Microsoft Visual Studio on your vCenter server. Do this by right clicking a CMD shortcut, run as administrator, start the MSI file.

You can also run this script from the commandline (no visual studio needed). In the script change the flag @DELETE_DATA from 0 to 1 so that it actually deletes the rows.

cd "C:\Program Files (x86)\Microsoft SQL Server\90\Tools\Binn" OSQL.EXE -E -S SERVERNAME\SQLEXP_VIM -i C:\file_containing_the_sql_script.sql

This was the result output:

VirtualCenter database user: dbo Logged in user: dbo Cutoff date: '2011/03/25' Batch size: 10000 2011-09-21 12:18:08 starting... 2011-09-21 12:18:08 VPX_TASK: no matching rows to delete. 2011-09-21 12:18:10 VPX_EVENT_ARG: no matching rows to delete. 2011-09-21 12:18:10 VPX_EVENT: no matching rows to delete. 2011-09-21 12:18:10 VPX_HIST_STAT1: no matching rows to delete. 2011-09-21 12:18:10 VPX_SAMPLE_TIME1: no matching rows to delete. 2011-09-21 12:18:10 VPX_HIST_STAT2: no matching rows to delete. 2011-09-21 12:18:10 VPX_SAMPLE_TIME2: no matching rows to delete. 2011-09-21 12:18:10 VPX_HIST_STAT3: no matching rows to delete. 2011-09-21 12:18:10 VPX_SAMPLE_TIME3: no matching rows to delete. 2011-09-21 12:18:11 VPX_HIST_STAT4: will attempt to delete 62633 rows. 2011-09-21 12:18:11 completed 10000 rows... 2011-09-21 12:18:12 completed 20000 rows... 2011-09-21 12:18:13 completed 30000 rows... 2011-09-21 12:18:13 completed 40000 rows... 2011-09-21 12:18:14 completed 50000 rows... 2011-09-21 12:18:15 completed 60000 rows... 2011-09-21 12:18:16 VPX_HIST_STAT4: deleted 62633 total rows. 2011-09-21 12:18:16 VPX_SAMPLE_TIME4: will attempt to delete 298 rows. 2011-09-21 12:18:16 VPX_SAMPLE_TIME4: deleted 298 total rows.   ****************** SUMMARY ******************* Deleted 0 rows from VPX_TASK table. Deleted 0 rows from VPX_EVENT_ARG table. Deleted 0 rows from VPX_EVENT table. Deleted 0 rows from VPX_HIST_STAT1 table. Deleted 0 rows from VPX_SAMPLE_TIME1 table. Deleted 0 rows from VPX_HIST_STAT2 table. Deleted 0 rows from VPX_SAMPLE_TIME2 table. Deleted 0 rows from VPX_HIST_STAT3 table. Deleted 0 rows from VPX_SAMPLE_TIME3 table. Deleted 62633 rows from VPX_HIST_STAT4 table. Deleted 298 rows from VPX_SAMPLE_TIME4 table. 

After this shrink the database file by removing the newly created empty space. Go Visual Studio > Select Database VIM_VCDB > Tasts > Shrink > Database
For me this resulted in a the file VIM-VCDB.mdf to shrink from around 4.100.000kb to 632.704kb.

I'm not a DBA guy but I think you can do the same with a SQL statement. Add this to a file and run it like above with OSQL.EXE.

DBCC SHRINKDATABASE SQLEXP_VIM

After this start the VI client, press CTRL+SHIFT+I and adjust the amount of logged data.
vCenter > Administration > vCenter Server Settings and select Statistics
vCenter > Administration > vCenter Server Settings and select Database Retention Policy

After 2 days the databse reached 4GB again! I tried the script I found in this article. The script seems to run forever, so I checked it the next day. The database size shrunk from 4GB to 400MB.

I don't know if this was a permanent solution cause the next day in my home lab I switched to the vCenter Virtual Appliance.


ESXi5, gPXE boot, ks script install via HTTP 150 150 Roderick Derks

ESXi5, gPXE boot, ks script install via HTTP

Howto perform a scripted ESXi 5.0 installation via HTTP and not TFTP? You can find the answer here. And the WHY question? Because HTTP is faster, can handle larger files, does not cost performance of your PXE boot server, and you not limited to your network (via internet is possible too).

For ESXi4 it was fairly easy to install via HTTP. VMware changed this into something more complicated, maybe to promote their integrated installation feature. The VMware vSphere documentation also lacks some information. This is the complete setup:

Install a PXE boot server.

Install the gPXELINUX.0 image:

yum install gpxe-bootimgs find /usr/ -name *gpxe* cp /usr/share/syslinux/gpxelinux.0 /tftpboot/

The DHCP config for Apache:

# pxe boot stuff allow booting; allow bootp; # gPXE options option space gpxe; option gpxe-encap-opts code 175 = encapsulate gpxe; option gpxe.bus-id code 177 = string; class "pxeclients" {   match if substring(option vendor-class-identifier, 0, 9) = "PXEClient";   next-server 10.0.2.11;     if not exists gpxe.bus-id {     filename "/gpxelinux.0";         } }

Now edit the /tftproot/pxelinux.conf/default file which will be loaded by the gPXE bootloader.

LABEL ESXi 5.0 KickStart and HTTP KERNEL http://10.0.2.14:8080/vSphere/ESXi_5.0/MBOOT.C32 APPEND -c http://10.0.2.14:8080/vSphere/ESXi_5.0/BOOT.CFG ks=http://10.0.2.14:8080/vSphere/ESXi_5.0/ks.cfg +++ IPAPPEND 1

Then the BOOT.CFG file from the extracted VMware's ISO was edited:

bootstate=0 title=Loading ESXi installer kernel=http://10.0.2.14:8080/vSphere/ESXi_5.0/TBOOT.B00 kernelopt=runweasel #kernelopt=ks=http://10.0.2.14:8080/vSphere/ESXi_5.0/esxi_ksFiles/ks.cfg modules=http://10.0.2.14:8080/vSphere/ESXi_5.0/B.B00 --- http://10.0.2.14:8080/vSphere/ESXi_5.0/USEROPTS.GZ --- http://10.0.2.14:8080/vSphere/ESXi_5.0/K.B00 --- http://10.0.2.14:8080/vSphere/ESXi_5.0/A.B00 --- http://10.0.2.14:8080/vSphere/ESXi_5.0/S.V00 --- http://10.0.2.14:8080/vSphere/ESXi_5.0/WEASELIN.I00 --- http://10.0.2.14:8080/vSphere/ESXi_5.0/TOOLS.T00 --- http://10.0.2.14:8080/vSphere/ESXi_5.0/IMGDB.TGZ --- http://10.0.2.14:8080/vSphere/ESXi_5.0/IMGPAYLD.TGZ

I use a Linux webserver, capital sensitive. I had to change all the lowercase letters in the filenames into captials. And mind this: the real filenames are different then the ones named in the vSphere install and configure guide.

Create a ks.cfg file and make it available on your webserver:

accepteula #dryrun install --firstdisk --overwritevmfs #url --url http://10.0.2.11/vmware/esxi/5.0/ks.cfg rootpw password reboot network --bootproto=static --ip=10.0.2.100 --gateway=10.0.1.254 --nameserver=10.0.2.11 --netmask=255.0.0.0 --hostname=esxi5.r71.nl --addvmportgroup=1  %firstboot --interpreter=busybox  # enable HV (Hardware Virtualization to run nested 64bit Guests + Hyper-V VM) #grep -i "vhv.allow" /etc/vmware/config || echo "vhv.allow = \"TRUE\"" >> /etc/vmware/config   # enable & start remote ESXi Shell  (SSH) vim-cmd hostsvc/enable_ssh vim-cmd hostsvc/start_ssh   # enable & start ESXi Shell (TSM) vim-cmd hostsvc/enable_esx_shell vim-cmd hostsvc/start_esx_shell

Good luck.

Alternative approach, same result:

Edit the dhcpd.conf as follows:

allow booting; allow bootp; option option-128 code 128 = string; option option-129 code 129 = text; next-server 10.0.2.11; #filename "/pxelinux.0";  if ((exists user-class) and (option user-class = "gPXE")) {    filename "http://10.0.2.14:8080/gpxe/boot.php";    } else {    filename "undionly.kpxe";    }

Add the php file to the webserver with the following content:

<?php echo "#!gpxe\n"; echo 'chain pxelinux.0' ."\n"; ?>

Add the following files to the webserver:

  • pxelinux.conf/default (pxelinux config file containing the menu)
  • chain.c32
  • menu.c32
  • memdisk

Add the following file to the tftpserver:

  • undionly.kpxe

That should work too.

    Your Name (required)

    Your Email (required)

    Subject

    Your Message

      Your Name (required)

      Your Email (required)

      Subject

      Your Message